
A Quick And Easy Guide To Making Face Masks

From the 10th of July, here in Scotland, we’ve been instructed to wear face masks when we go outside, to protect ourselves and protect others.
With disposable masks in high demand (and with a price-tag to match!), this weekend gave me an opportune moment to, quite literally, dust off my sewing machine (I haven’t touched the poor thing since Christmas) and see if I could make some re-useable face masks that would be compliant with the government’s advice.
Initially, I tried to follow a couple of video tutorials that were very well made, but ultimately left me rather confused.
My first attempt was hugely oversized, and far too thick to be comfortable. Really, it ended up looking more like something Dick Turpin might have worn before approaching someone on the highway than something I could pop on to go to the shops.
I need solid instructions, it seems!
Rather than try yet another guide, I was inspired to examine some disposable face masks, and combine some of the sizing and elements from them with ideas I gained the other tutorials, and make my own pattern.
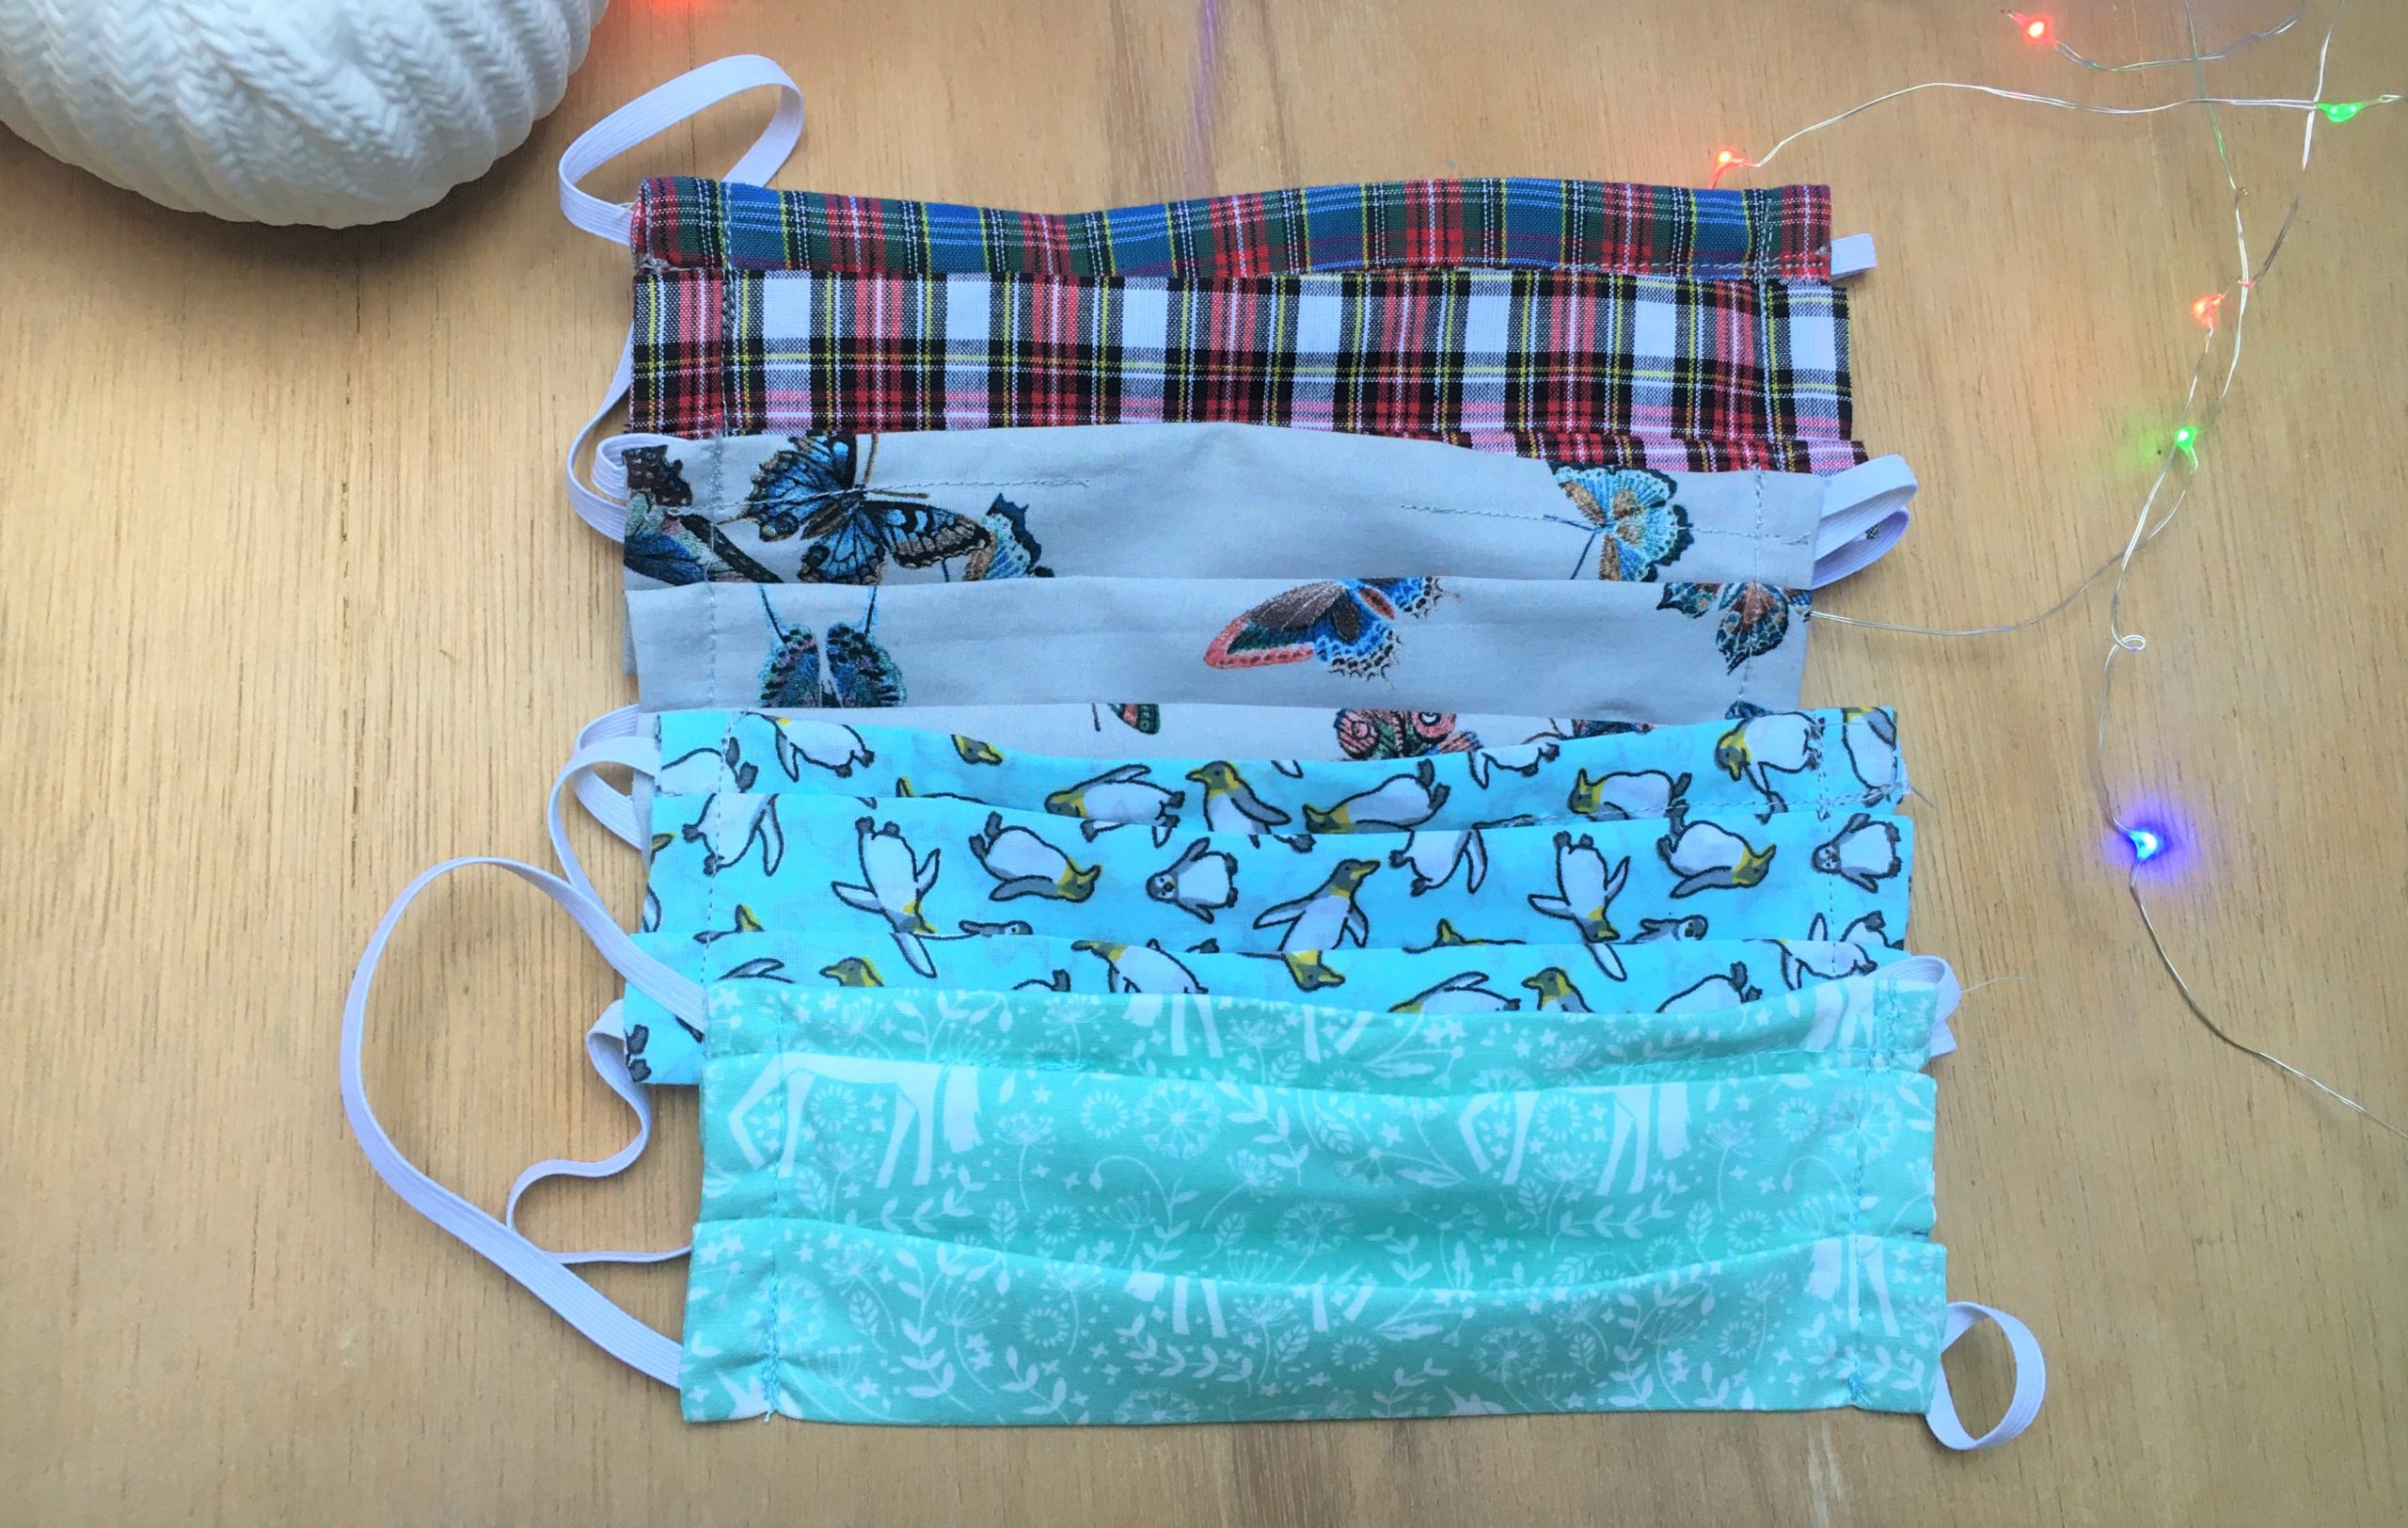
So far, I’ve made four different versions for members of my family, and some friends too — and the only thing I’ve needed to adjust for a comfortable fit were the elastic loops for the ears.
It is very straightforward, needs minimal sewing knowledge, and — once you’ve got the hang of it — can be knocked out in less than 20 minutes.
If you, or someone you know, has a sewing machine, this could be an easy alternative to buying a reusable mask online, or wearing disposables.
What you need
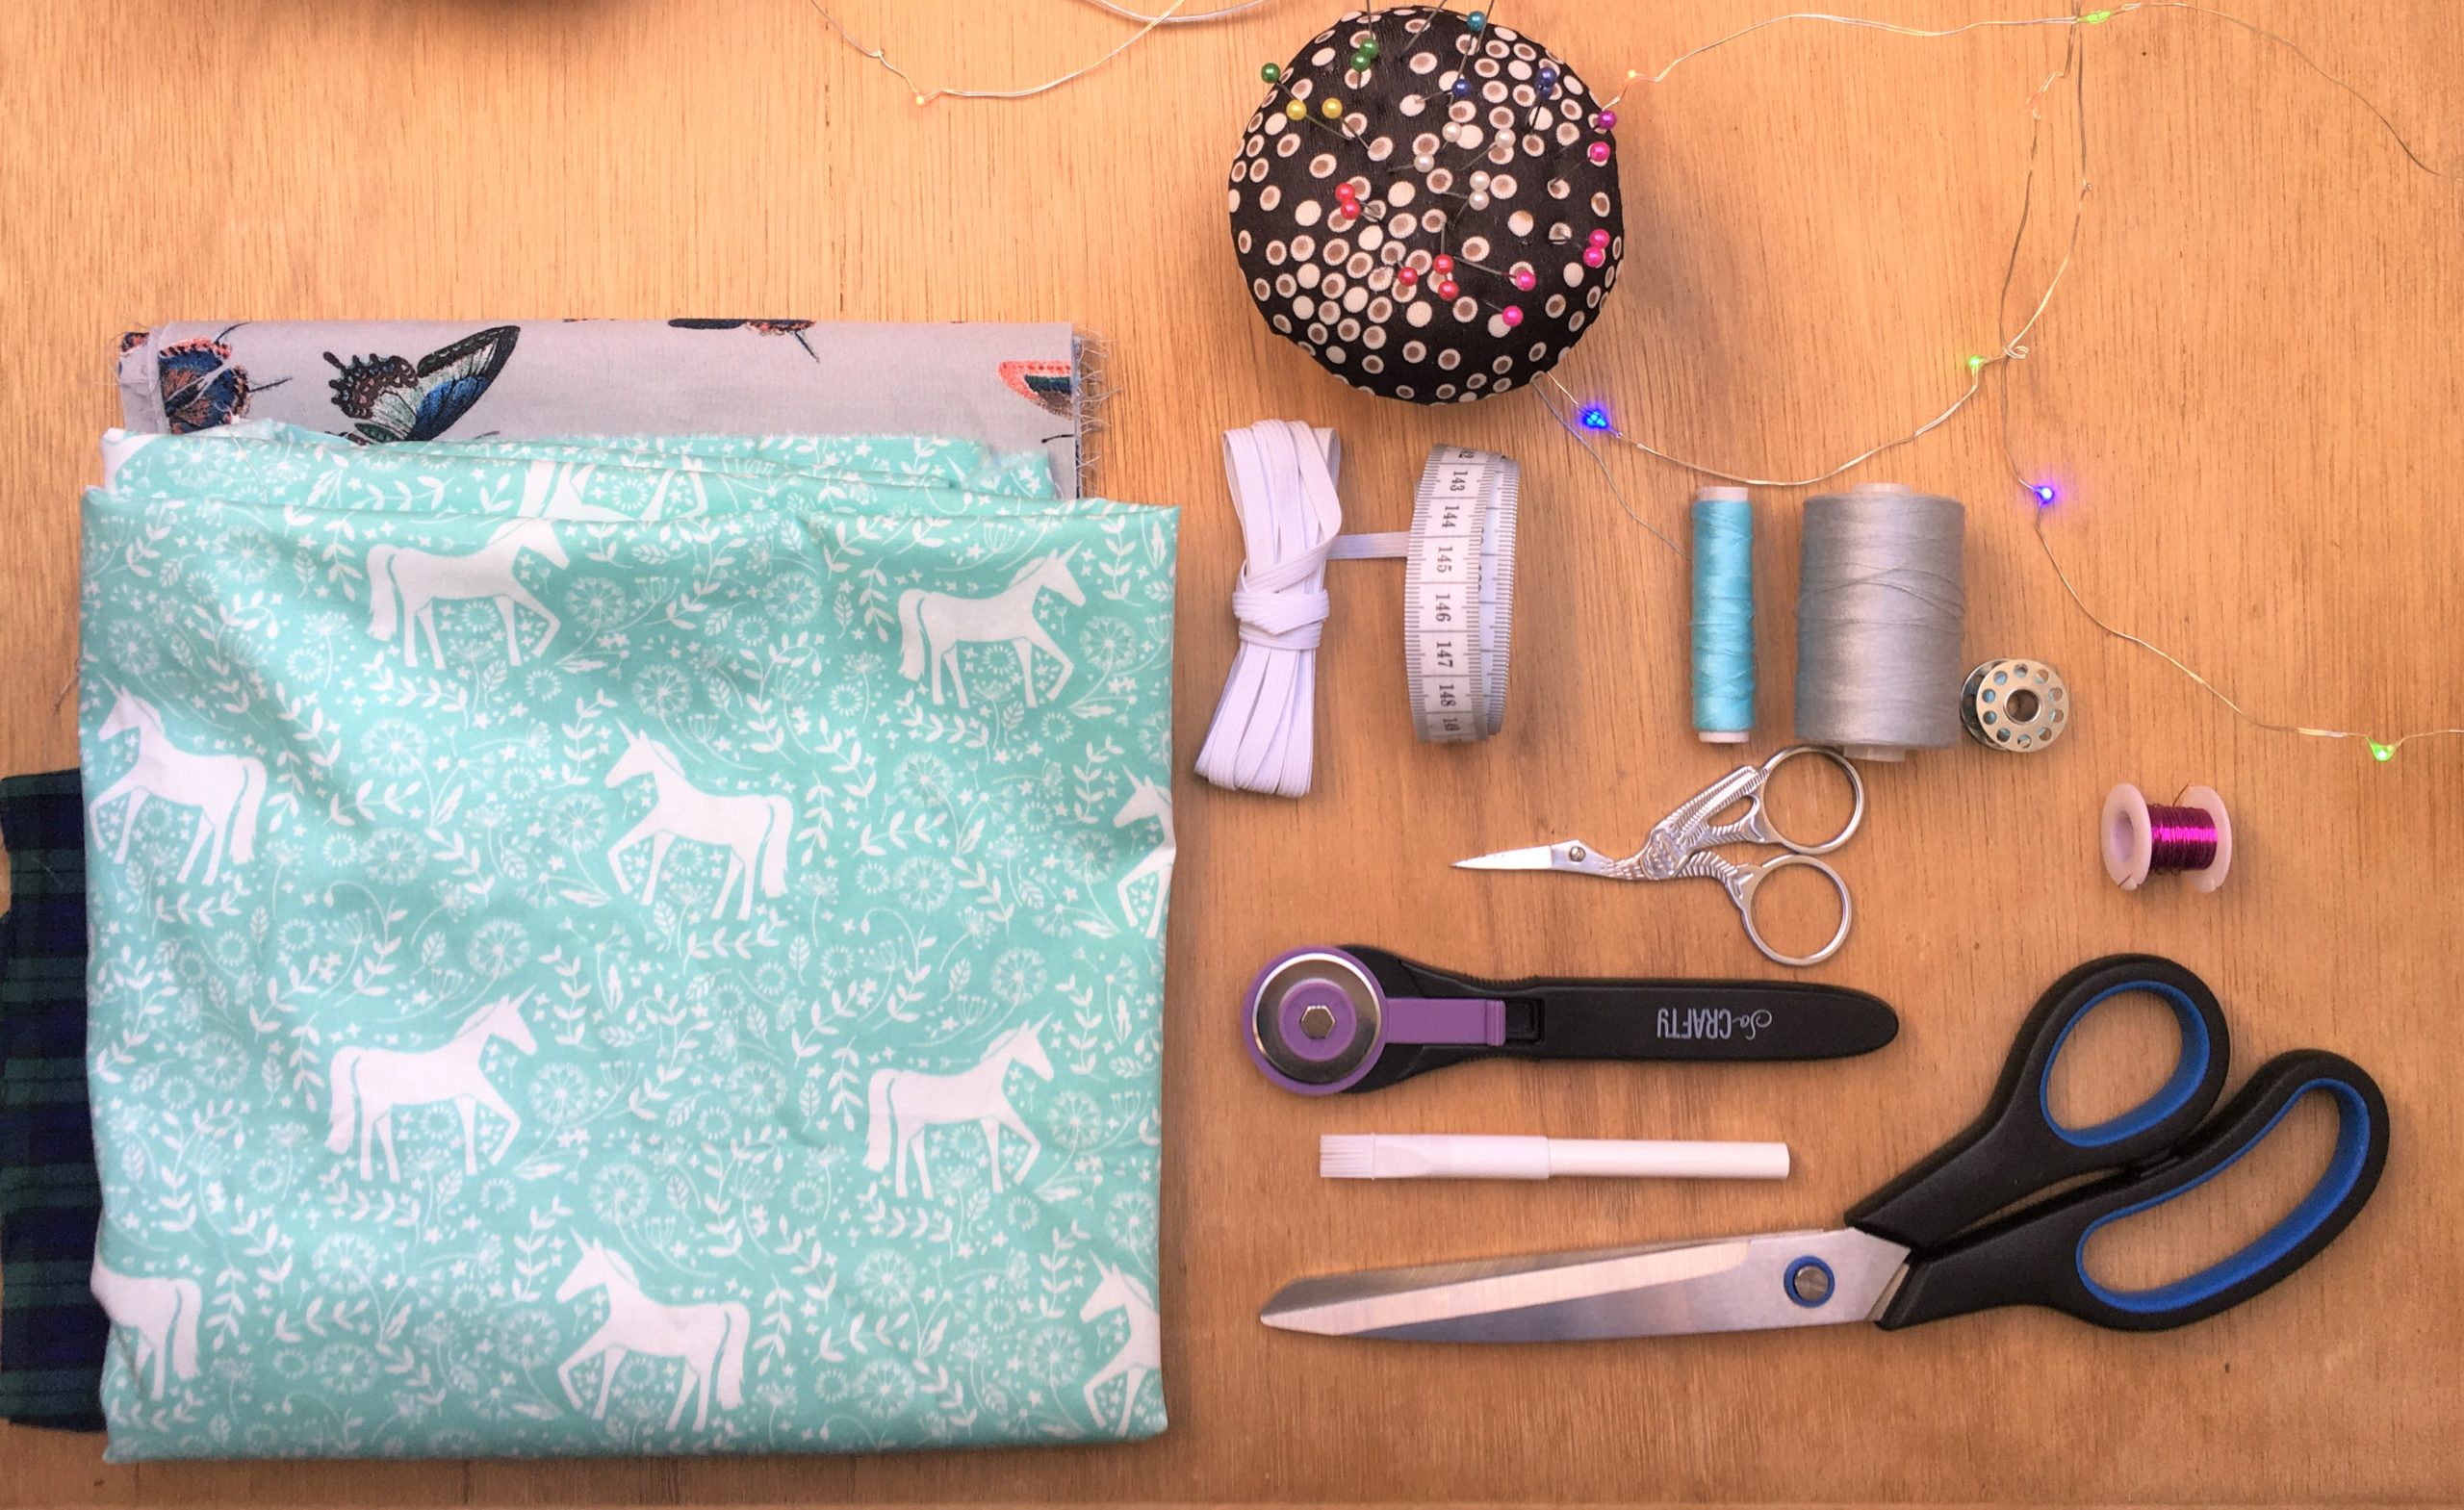
- Fabric Shears / Rotary Cutter
- Embroidery Scissors
- Measuring Tape
- Ruler / Straight Edge Tool
- Cutting Mat / Flat Surface
- Water Soluble Pencil / Marker / Tailor’s Chalk
- Pins
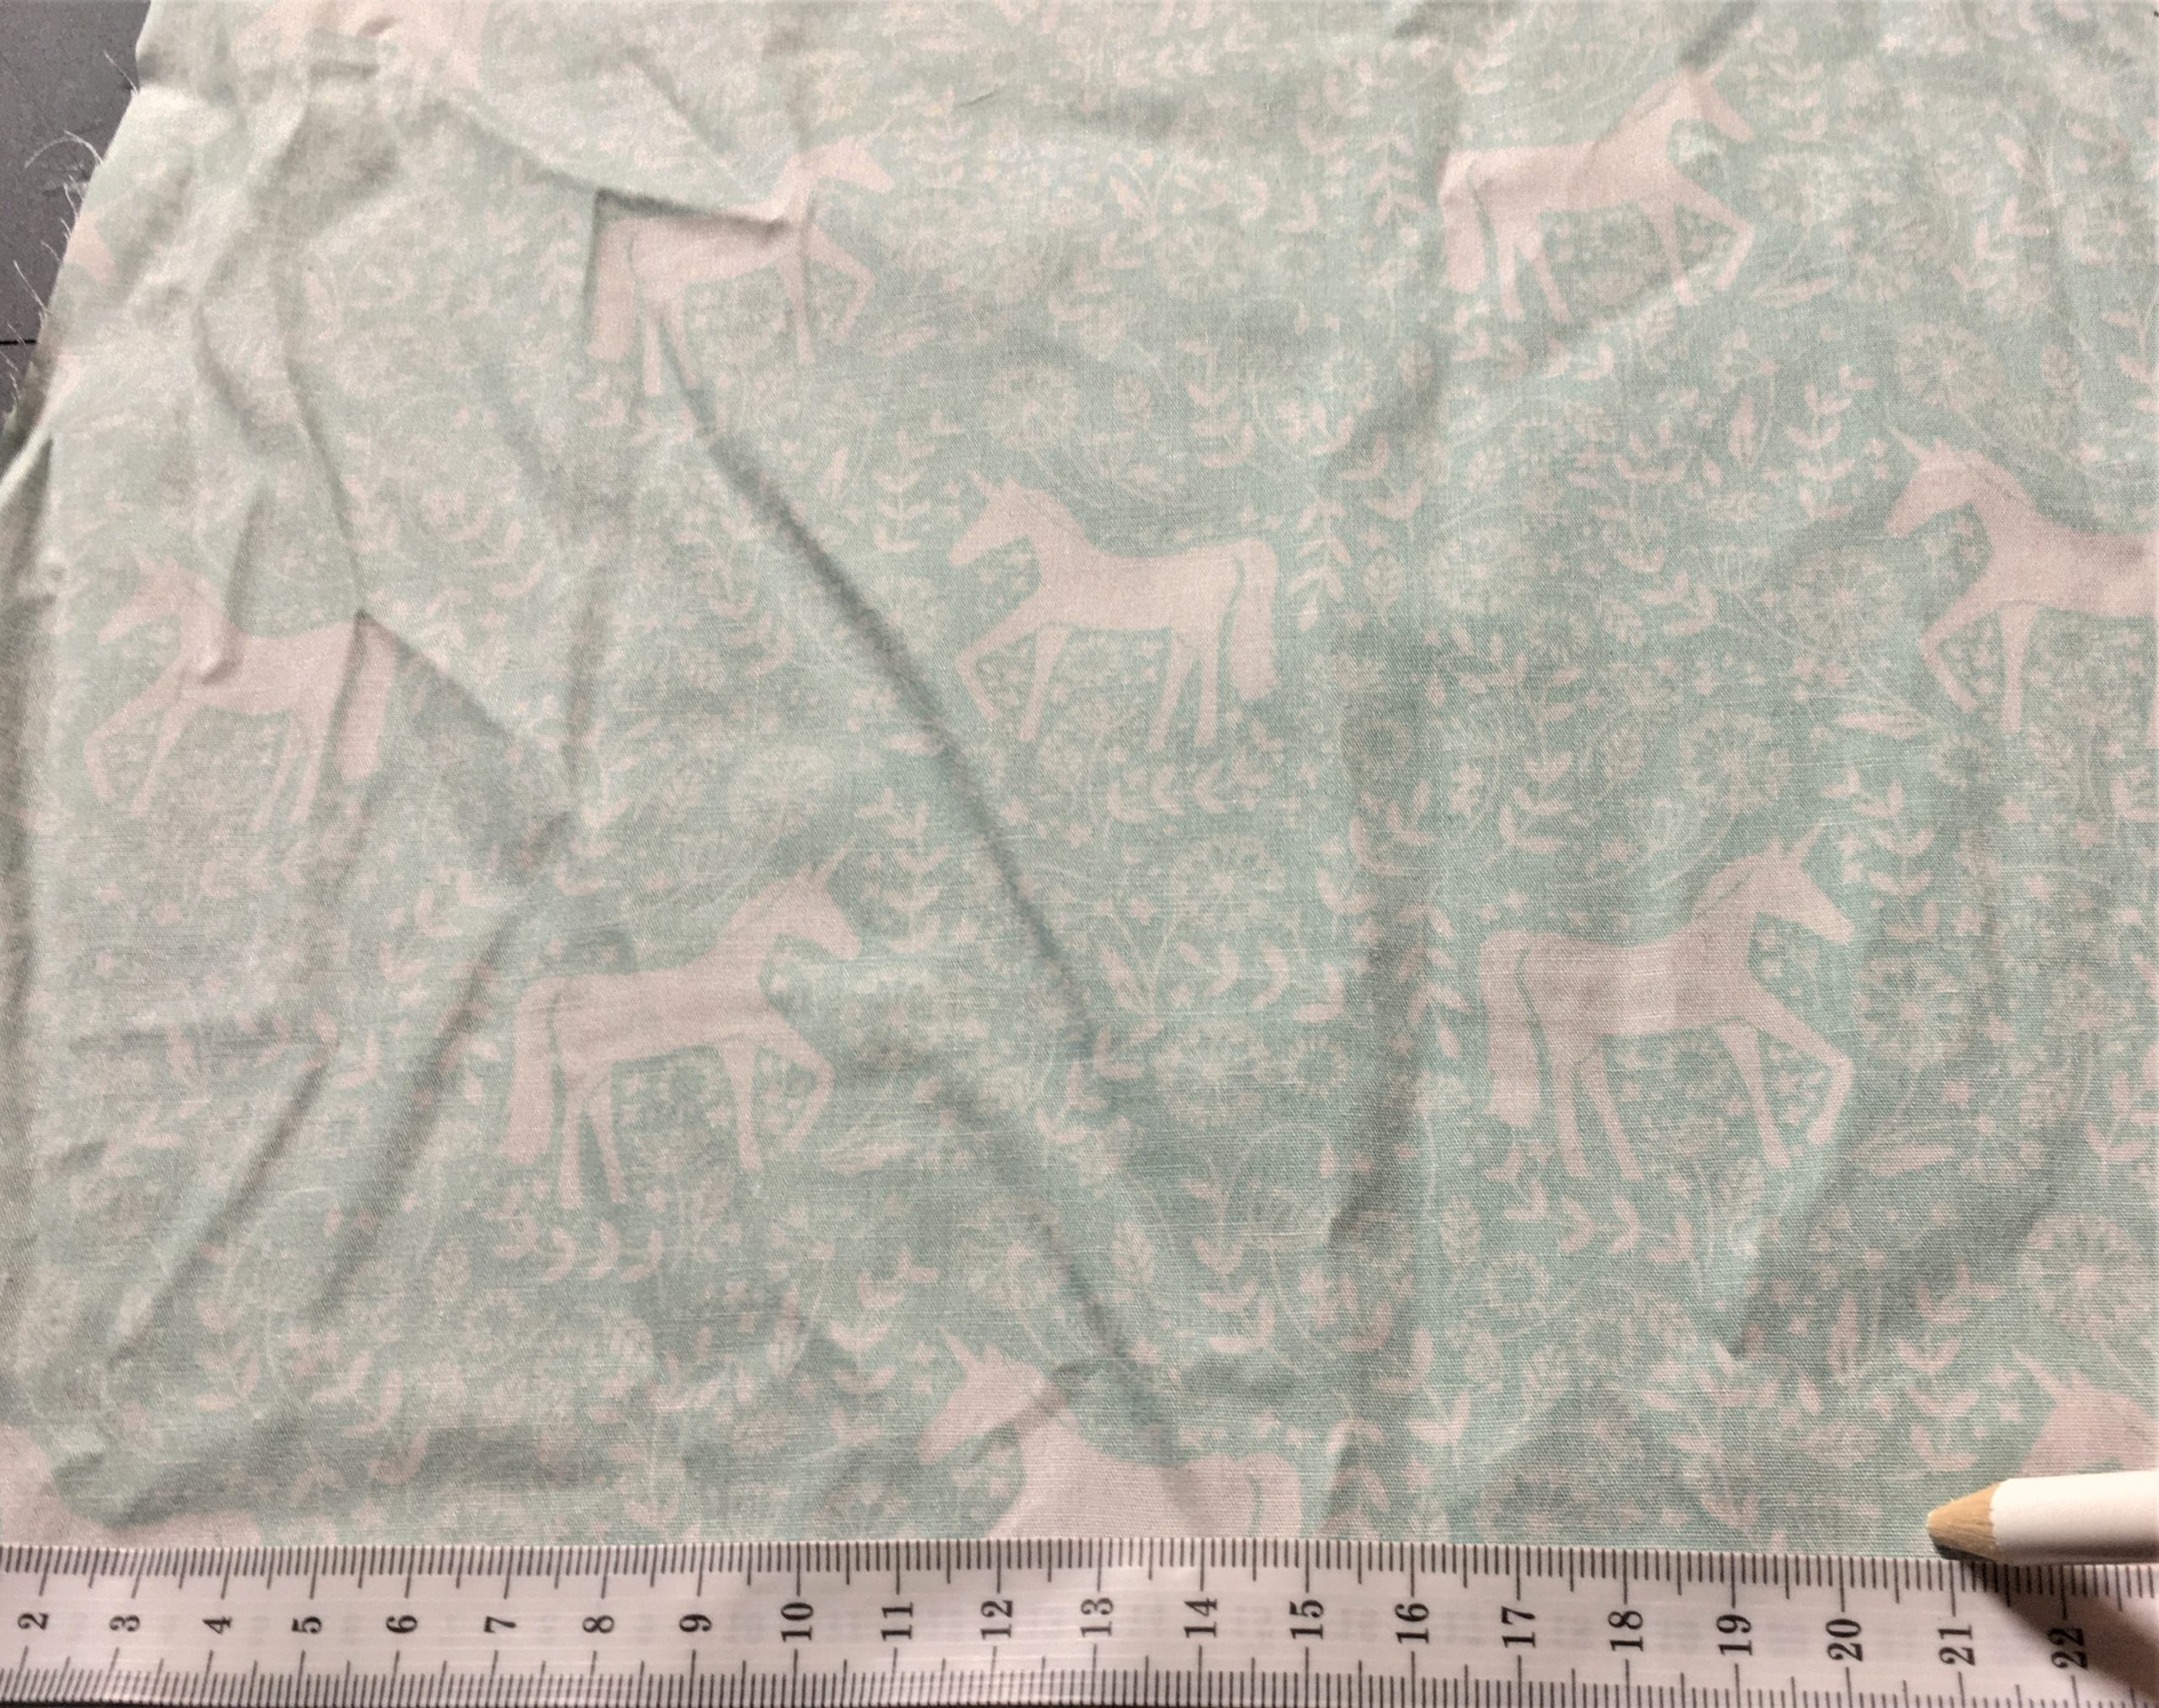
- Densely woven cotton fabric
- Thin elastic (Or an alternative for ties, such as bias tape, or ribbon.)
- Thin but sturdy wire (jewellery wire, garden wire, a thin pipe cleaner or even a flattened out paperclip will all work.)
- OPTIONAL: this pattern features a pocket that you can insert a filter into. You can buy purpose-made filters, but according to several sources even paper filter from a coffee machine will suffice!
How to make
The first step is to select your fabric. You’re looking for something that will be comfortable enough for prolonged wear, and tight enough woven to be effective, yet breathable.
If you are an avid sew-ist, it is highly likely you may already own several cotton fabrics, as it is common for craft and quilting.
If you do not, you could also use an old pillowcase, or a thin tea-towel.
I have also seen other guides suggest you can use a t-shirt. If you are an experienced or confident sewer, that’s a good option!
If not, I’d seriously recommend against it — jersey and other stretchy fabrics are notoriously difficult to work with. Personally, I’ve done a lot of work with stretch fabrics, and no matter how complex or simple the job, working with woven fabrics is a dream in comparison!
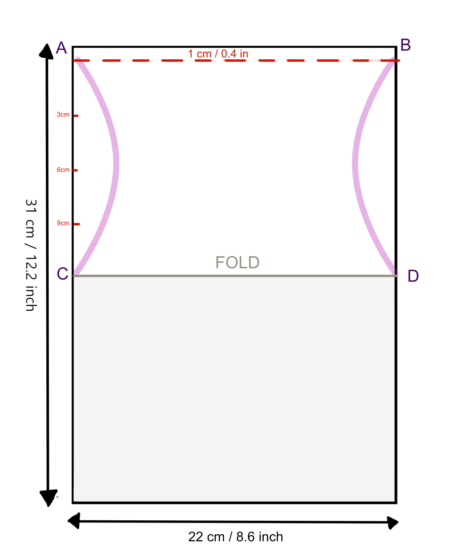
Once you’ve selected your fabric, you’ll want to lay it out flat and measure a rectangle of 22 cm (8.6 in) x 31 cm (12.2 in).
I like to mark my lines with tailors’ chalk. I have made a diagram/pattern to try and help you follow along.
This particular pattern/method may need tweaked to be made in jersey, as I have used it exclusively for wovens.
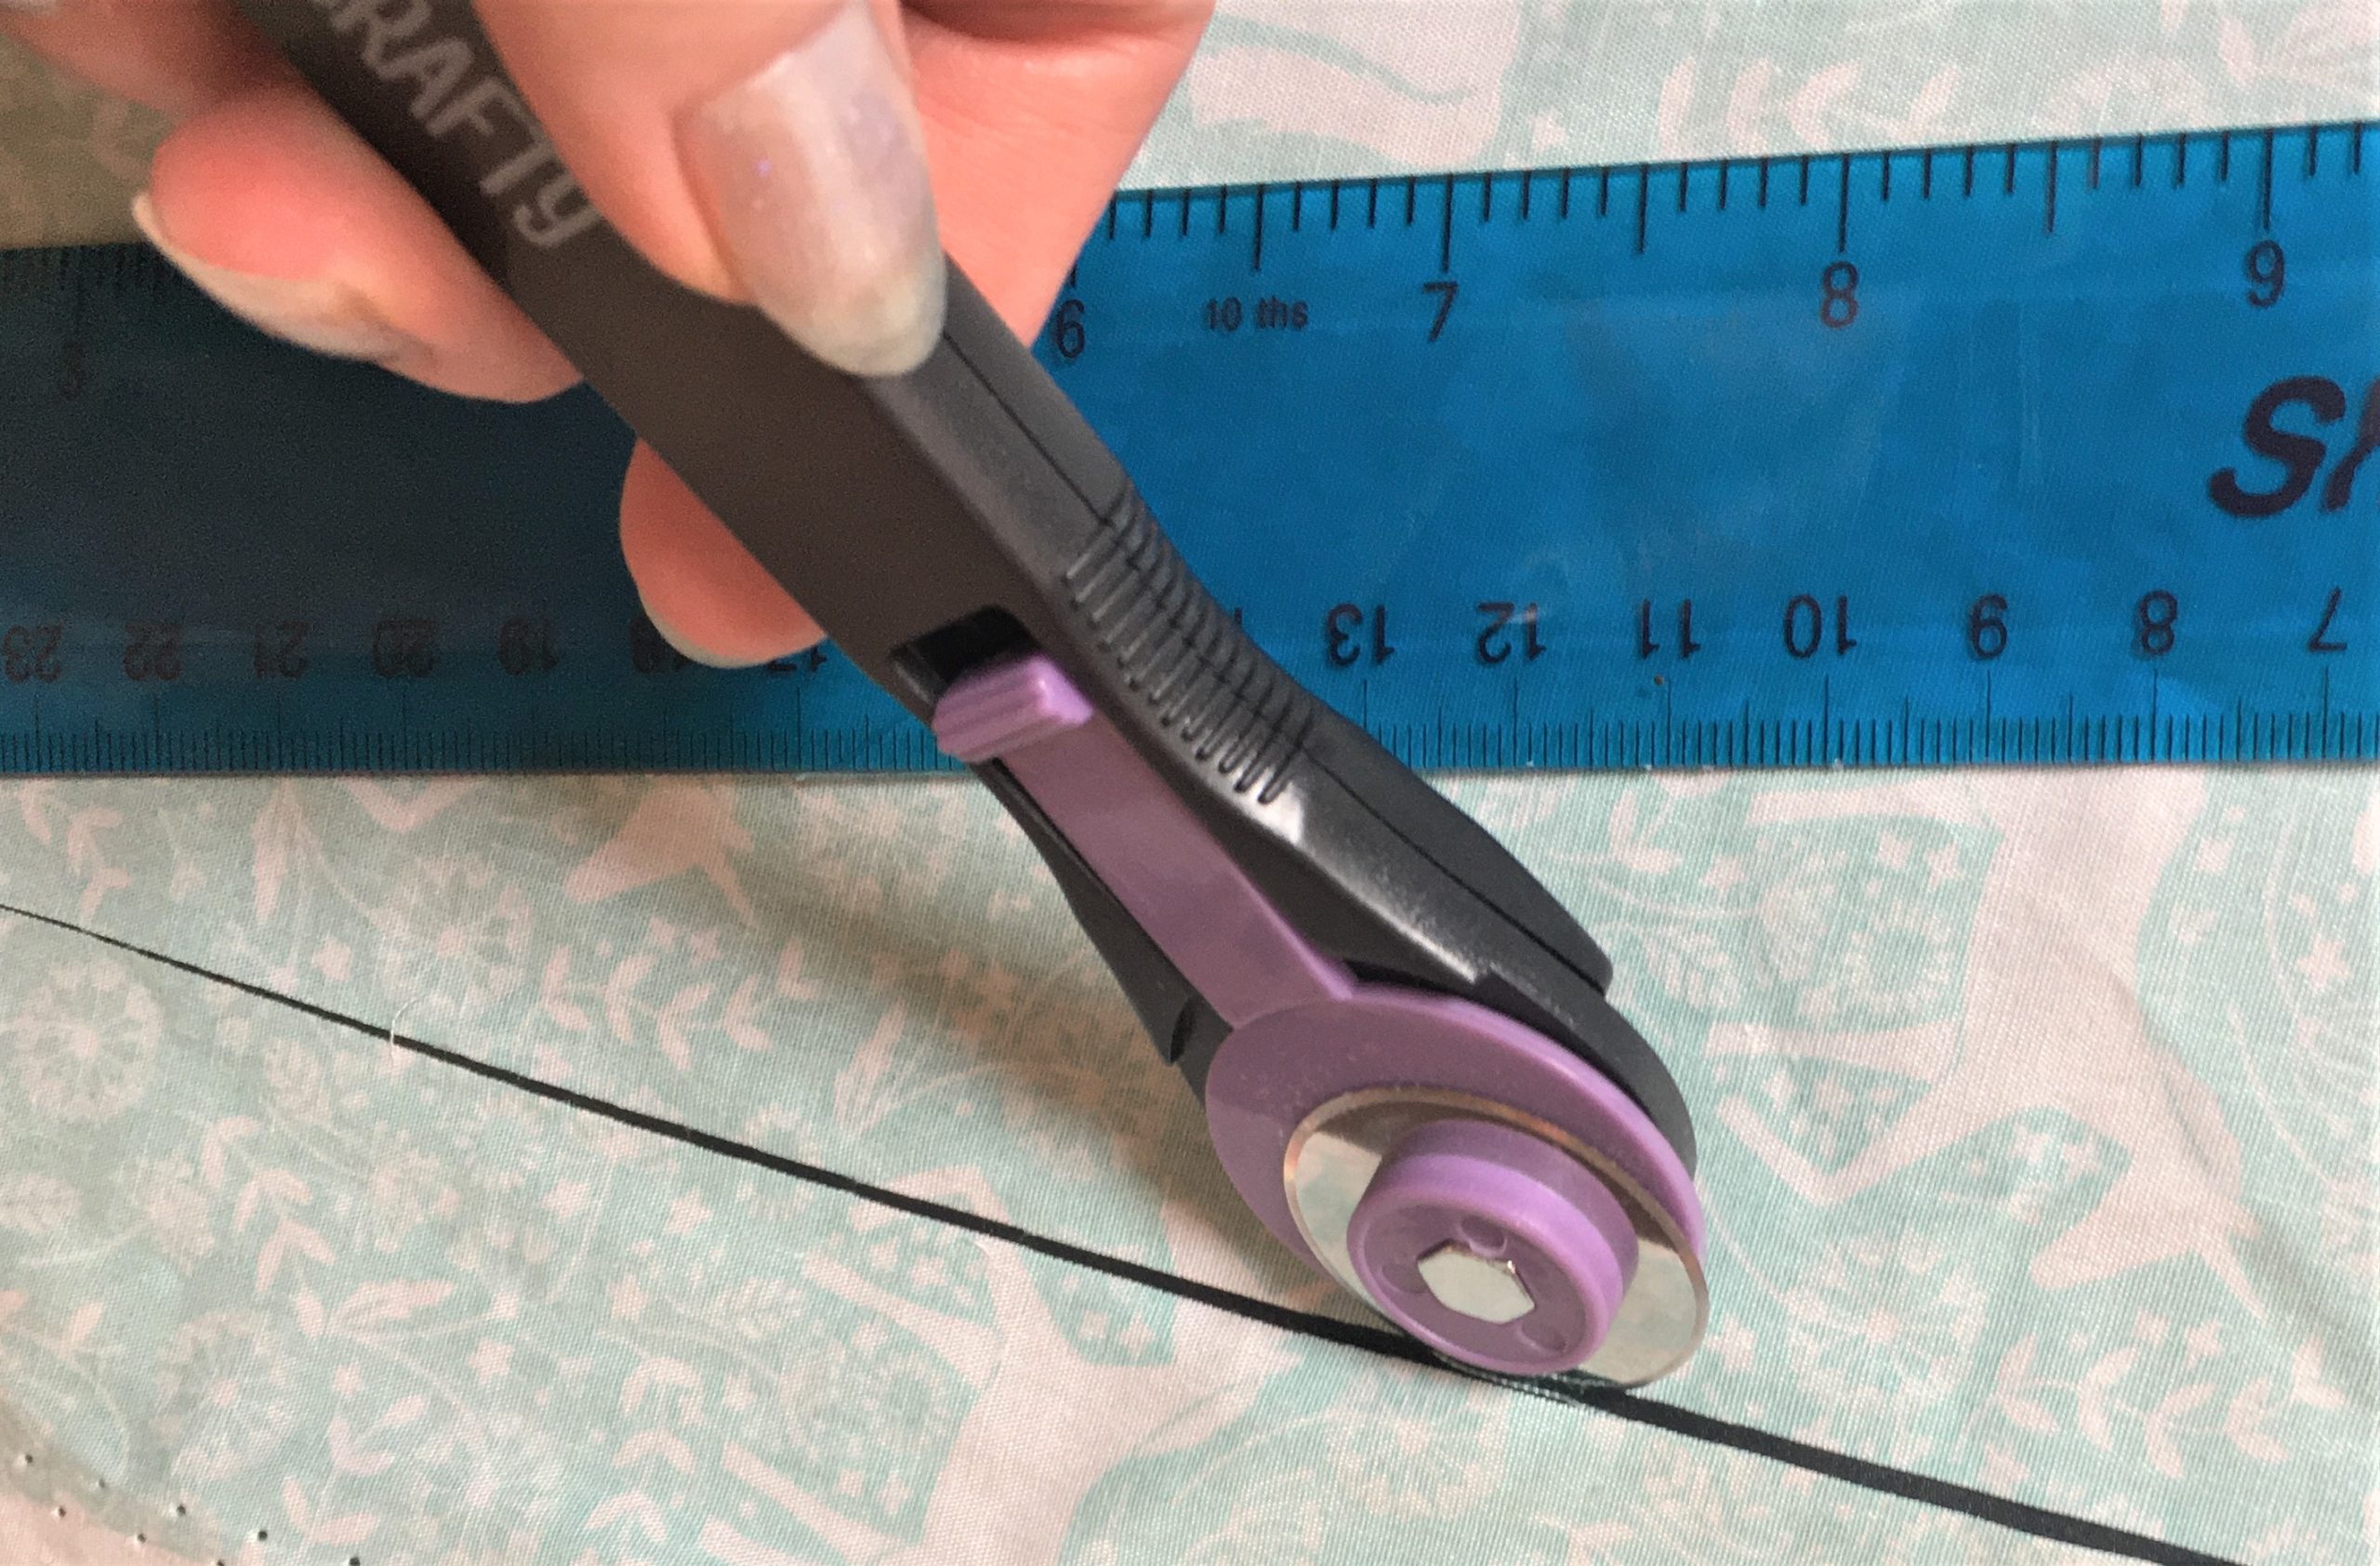
After marking out your pattern onto the fabric, cut it out.
I use a rotary cutter, as it makes it easier to cut along the edge of a ruler and quickly and easily achieve straight lines. Alternatively, you can use scissors.
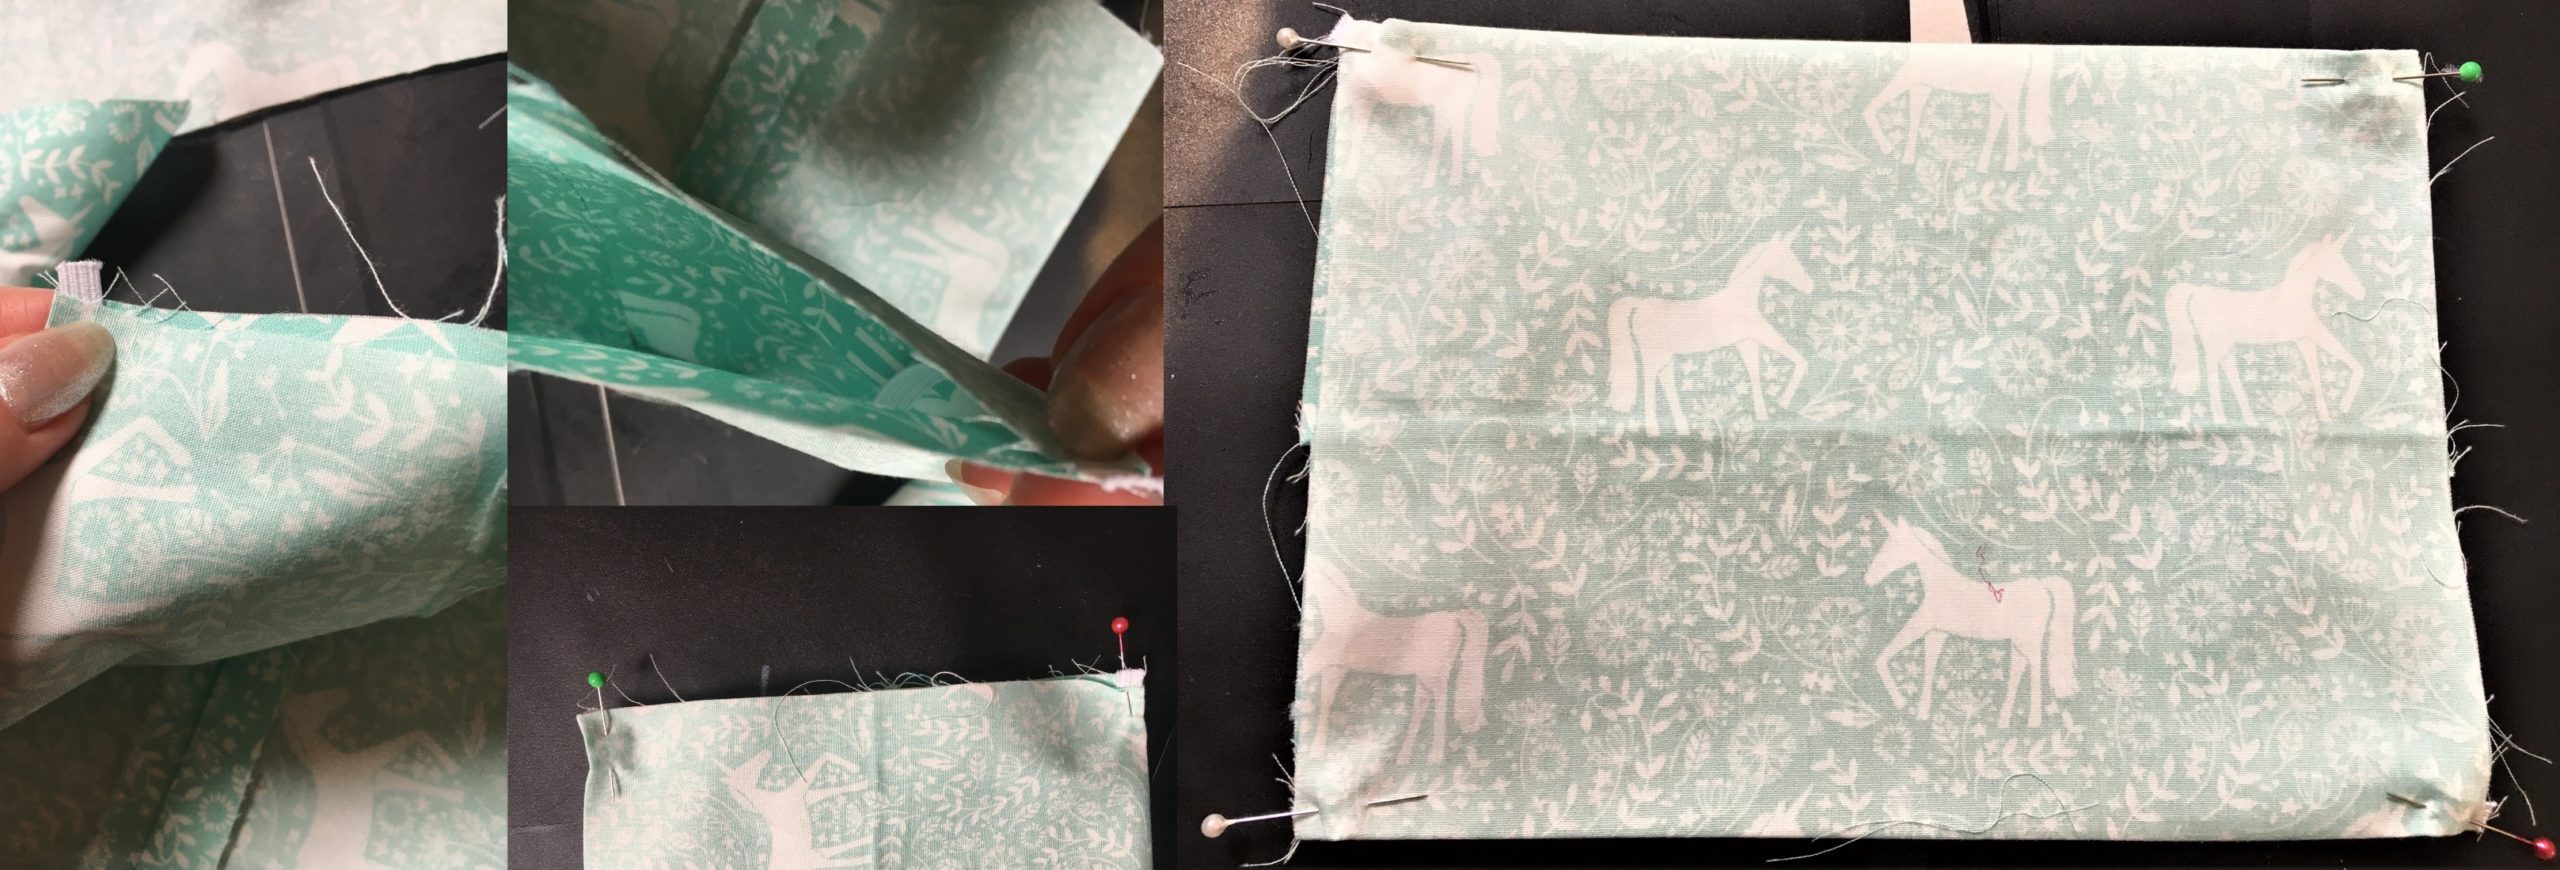
After cutting the fabric, fold it in half, right sides together, with the short edges to the top.
At this point, I advise you iron your new fold in place.
As we’re working with cotton, frequent pressing will make it easier to hold folds in place. At this point you may want to pin your fabric.
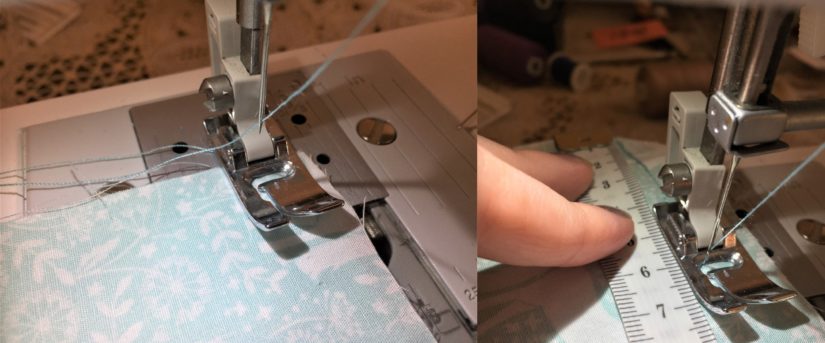
At this point, sew along the raw edge, leaving a 1 cm seam allowance.
First sew in roughly 6 cm from corner A, then the same distance from corner B. You must leave a large enough gap to allow you to fit a filter into the pocket.
If you aren’t using a filter, you must still keep a gap so that you can turn the mask right side out.
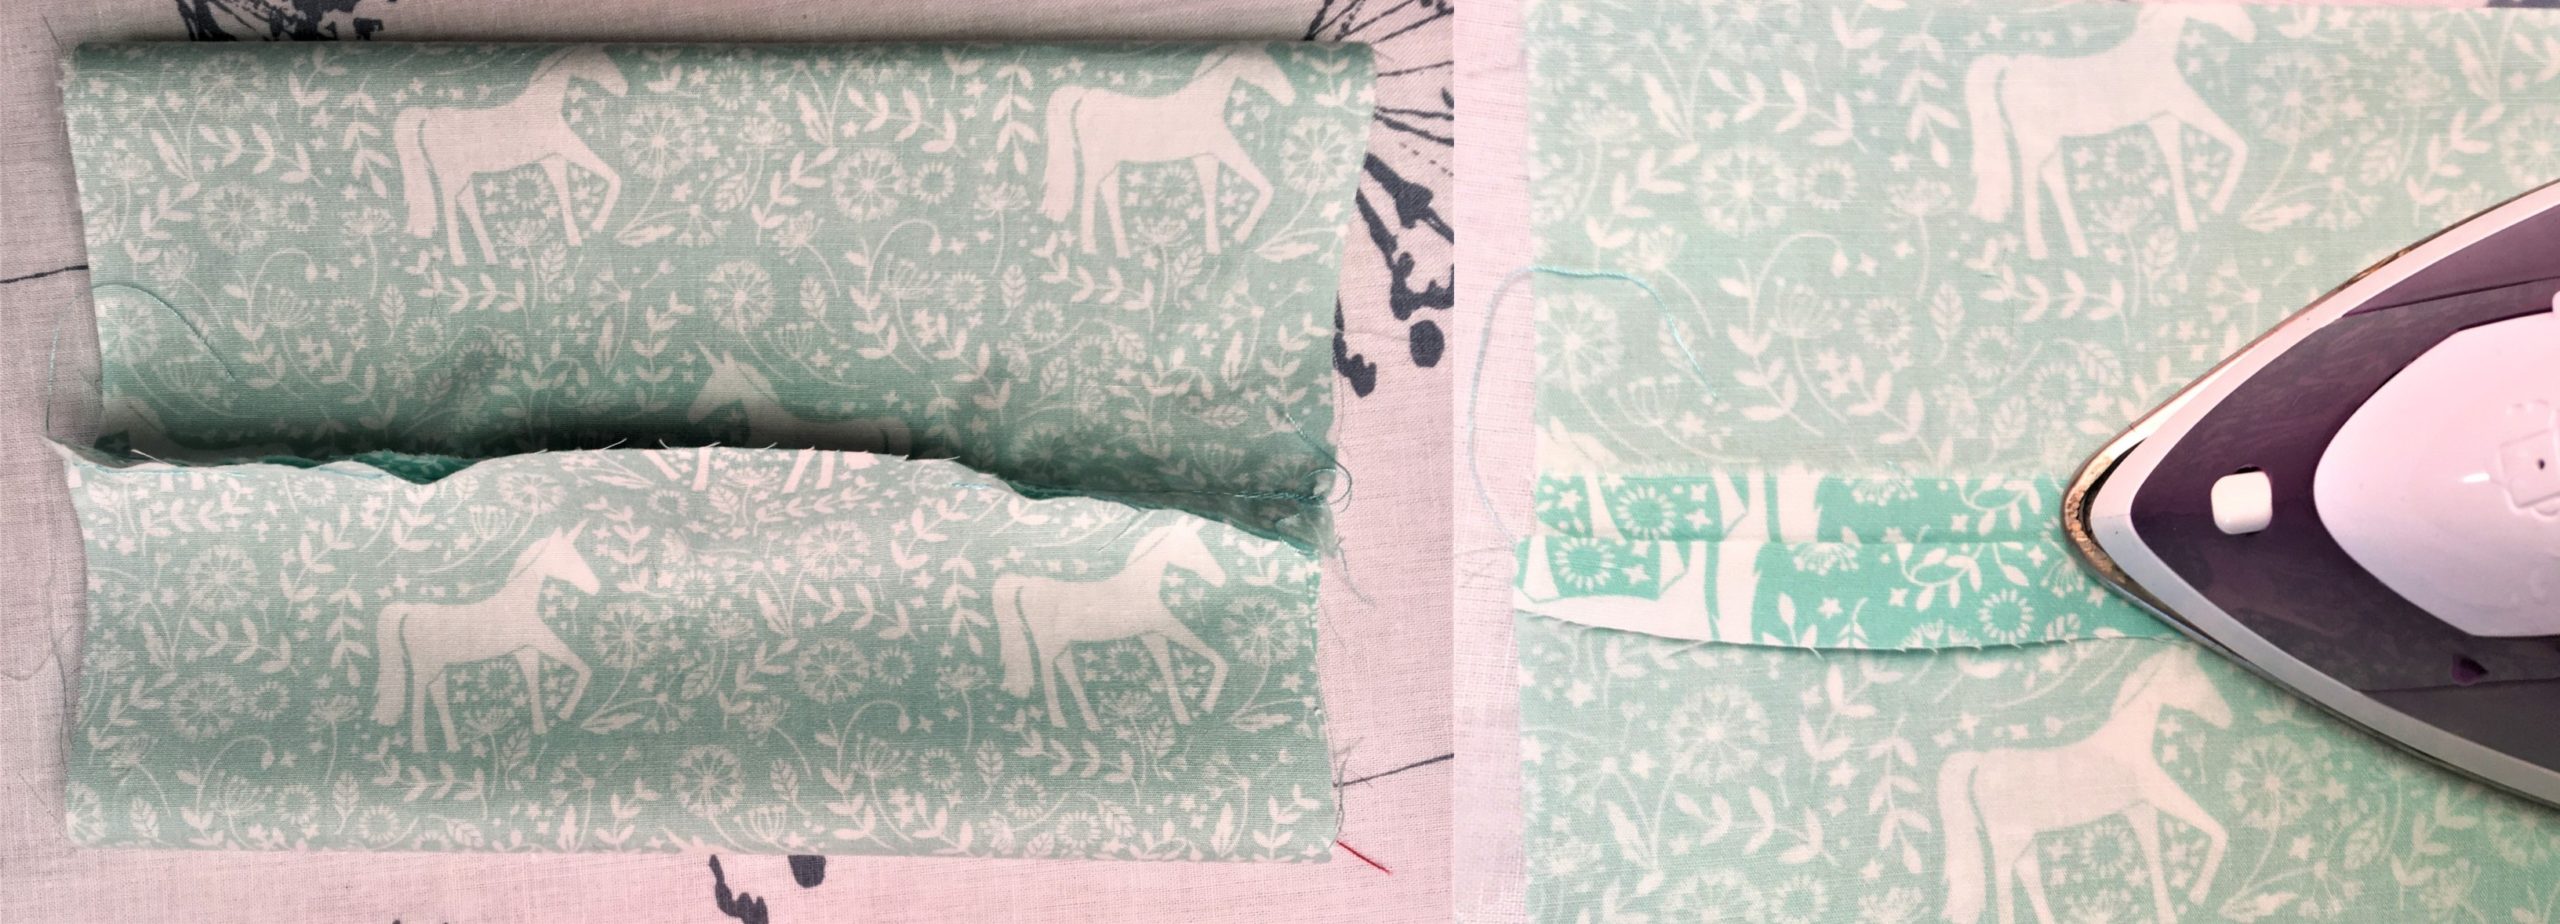
This should leave you with a tube of fabric. Arrange it so that the new seam, and the hole, are centralised. Press the seam flat.
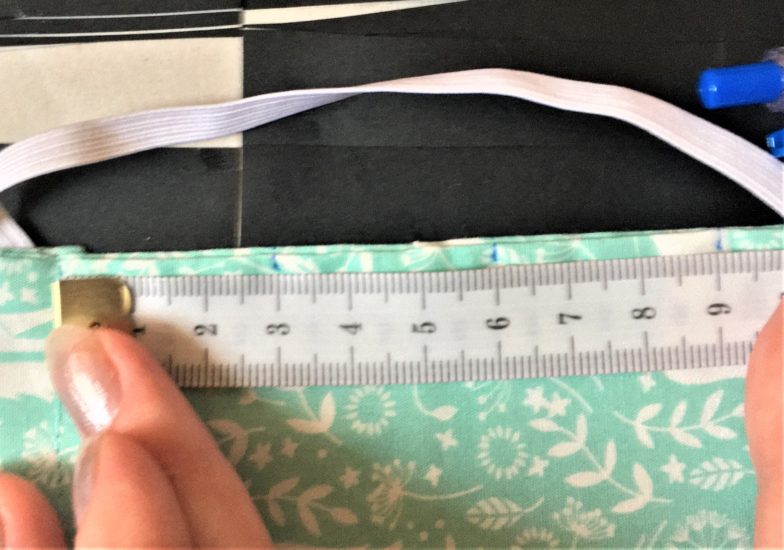
The next step is to cut your ear loops.
For this you’ll need to measure out two equal sized pieces of elastic. As people’s head sizes vary, there is room for customisation here.
You don’t want the elastic to be too loose, as the mask will gape. You also don’t want it to be too tight, as it will be uncomfortable to wear.
A good average length for the elastic is 18 cm, or 7 in. If in doubt, remember it is easier to shorten elastic than to lengthen it. (I speak from experience!)
If you don’t have elastic, then not to worry! You can easily substitute one piece of elastic it for two separate ties made of non-elastic fabric.
They will simply need tied together and adjusted to fit the wearer.
Placing the elastic into the corners of the tube is the most tricky part of making this mask. But once you’ve made a couple, you’ll get the hang of it in no time.
The idea is to insert a piece of elastic with one end in corner A, and the other in corner D.
Take your time, and secure the elastic in place with pins. Repeat on the opposite end of the tube.
The length of elastic should be facing the inside of the tube, as this is the right side of the finished mask.
If you are nervous that the elastic won’t hold in place, you might want to sew over each end of elastic separately at this point.
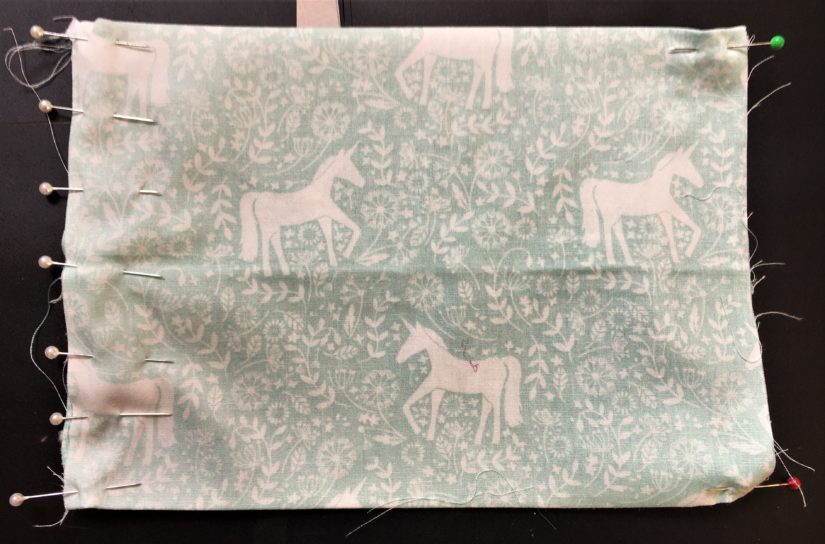
Otherwise, continue to pin down each side of the tube to hold the fabric in place. Then line the presser foot of your machine down with the pinned edge, and sew a straight stitch down the entire length of the mask. Secure it at either end with a backstitch.
Be careful that you only sew over the elastic at the corners, where you want to secure it.
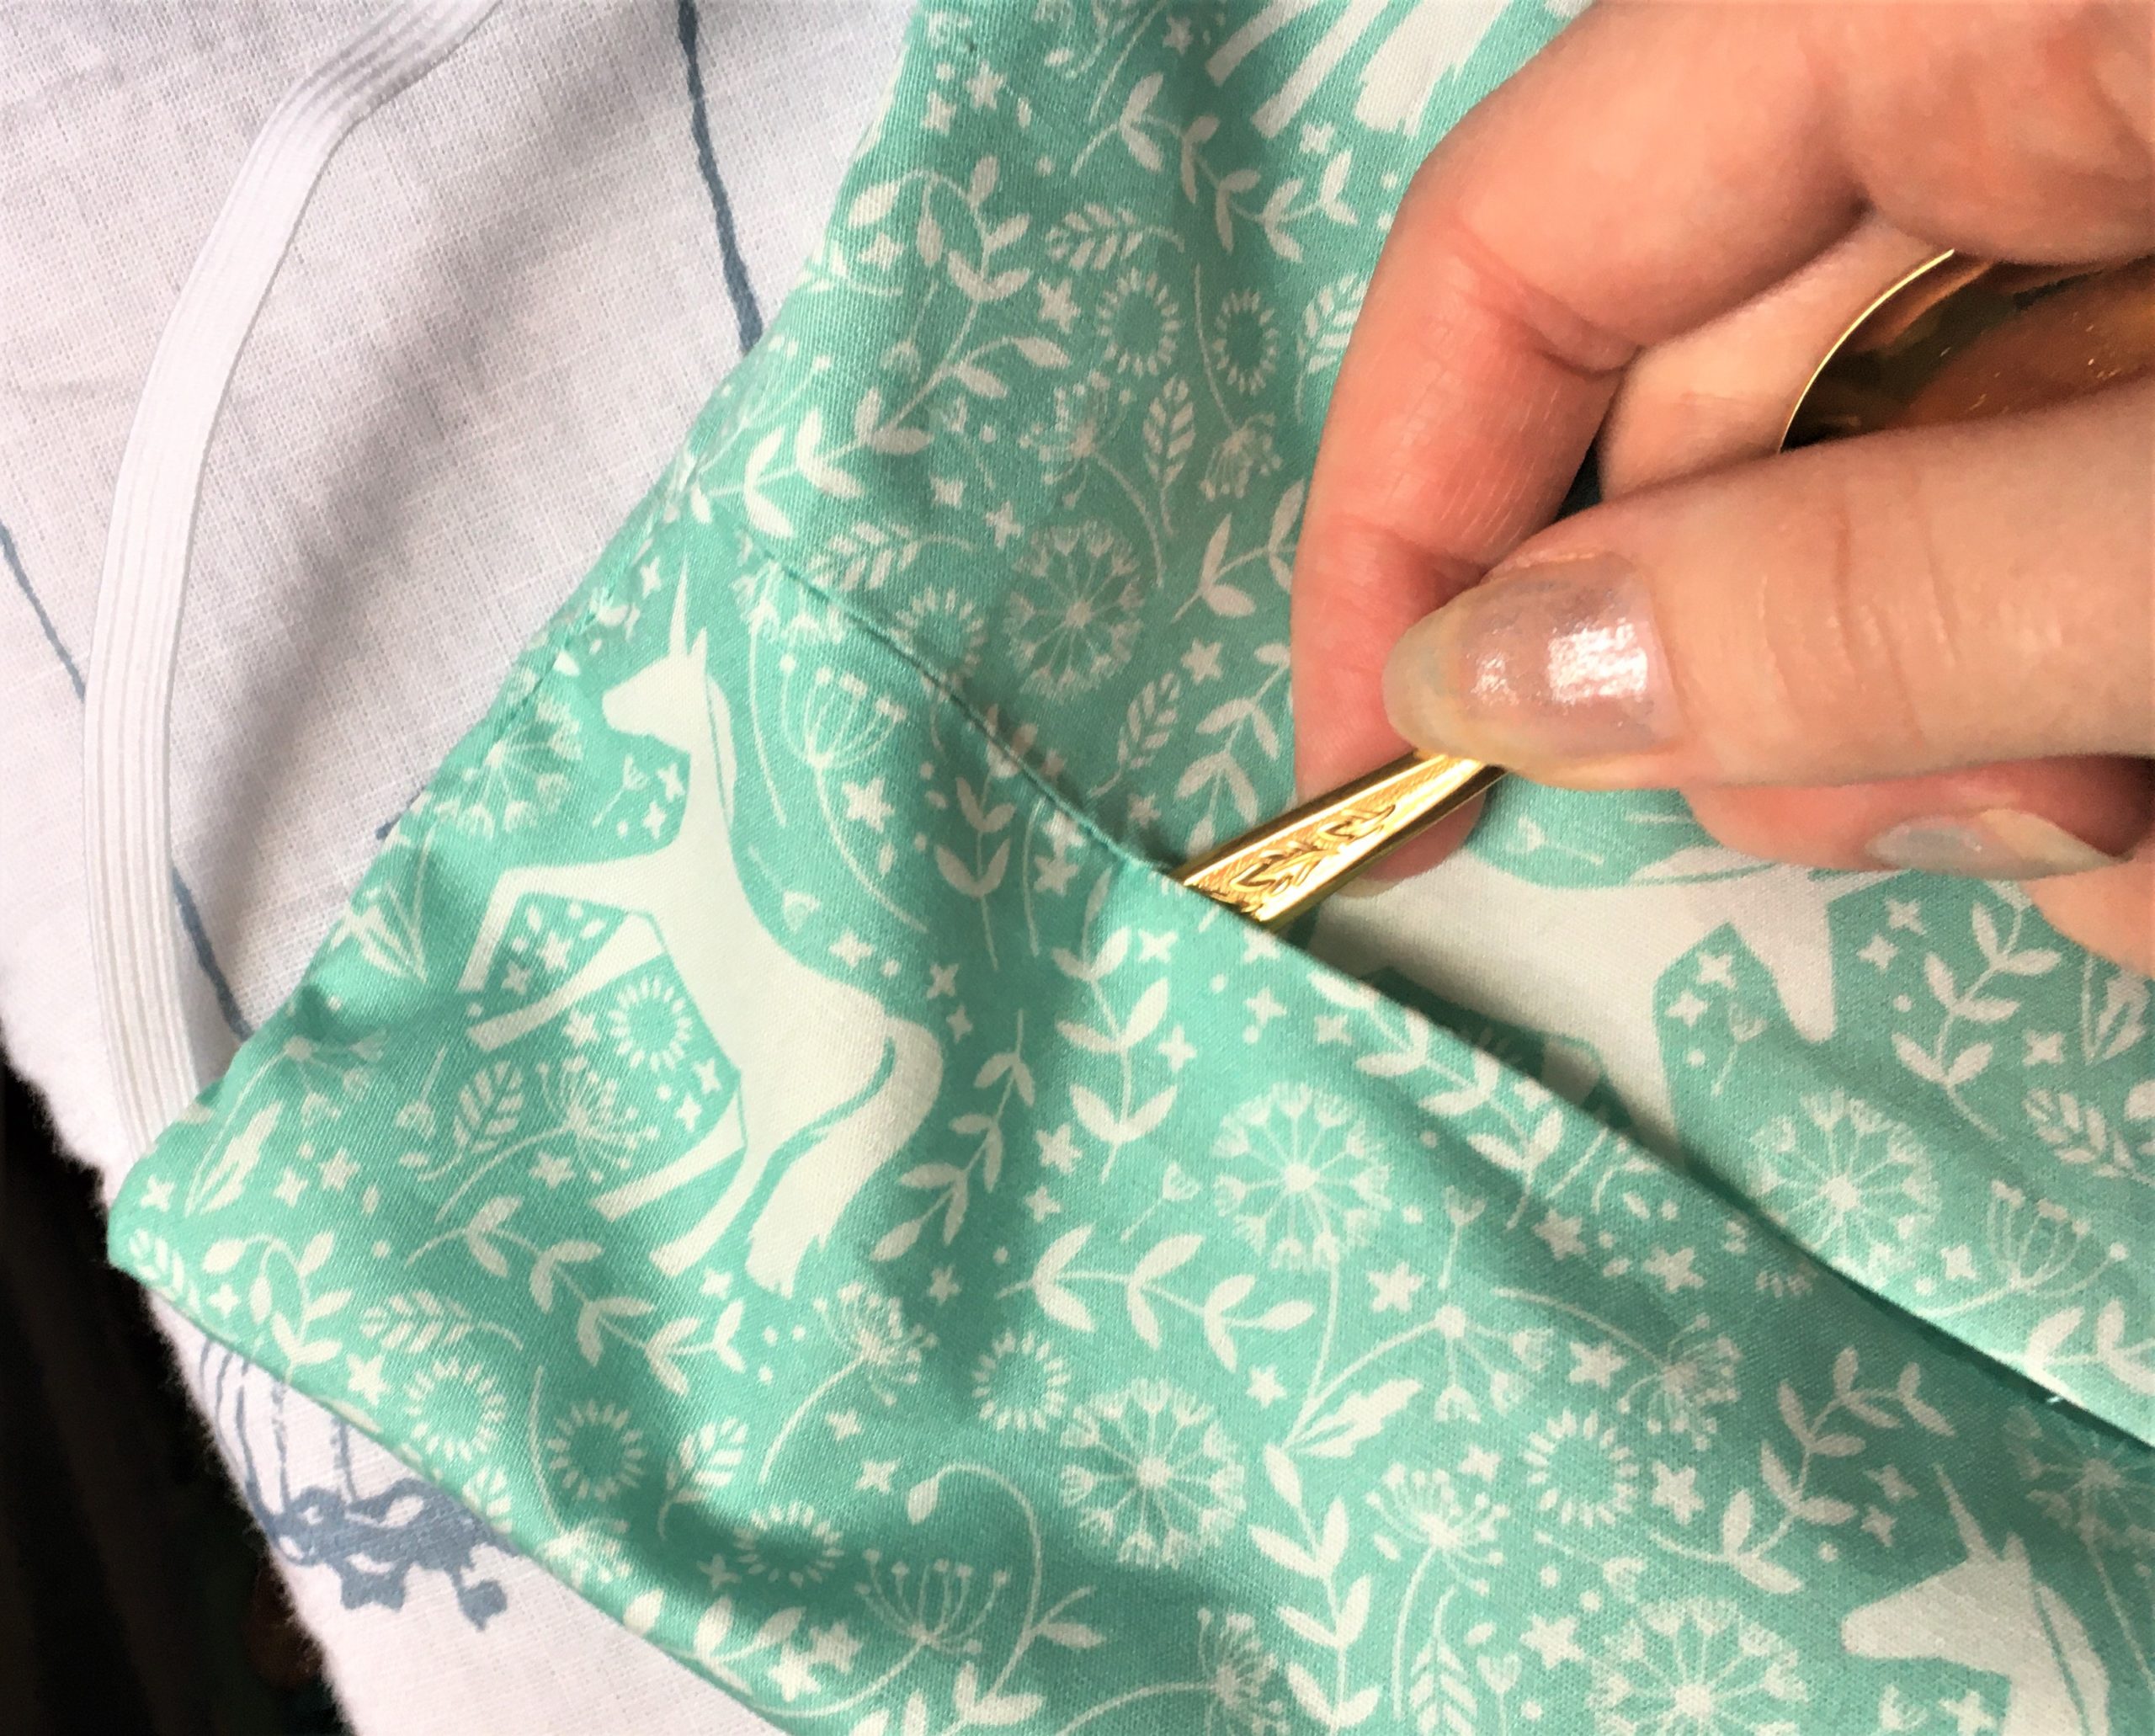
The exciting part is next!
Carefully, through the hole you left in the centre, turn the fabric right-side out. You should now have an elasticated rectangle that looks vaguely mask-like!
Use an implement to gently turn the corners out (you get specific instruments for this purpose, or you can use something like a flat ended teaspoon, like I did!). This makes a big difference!
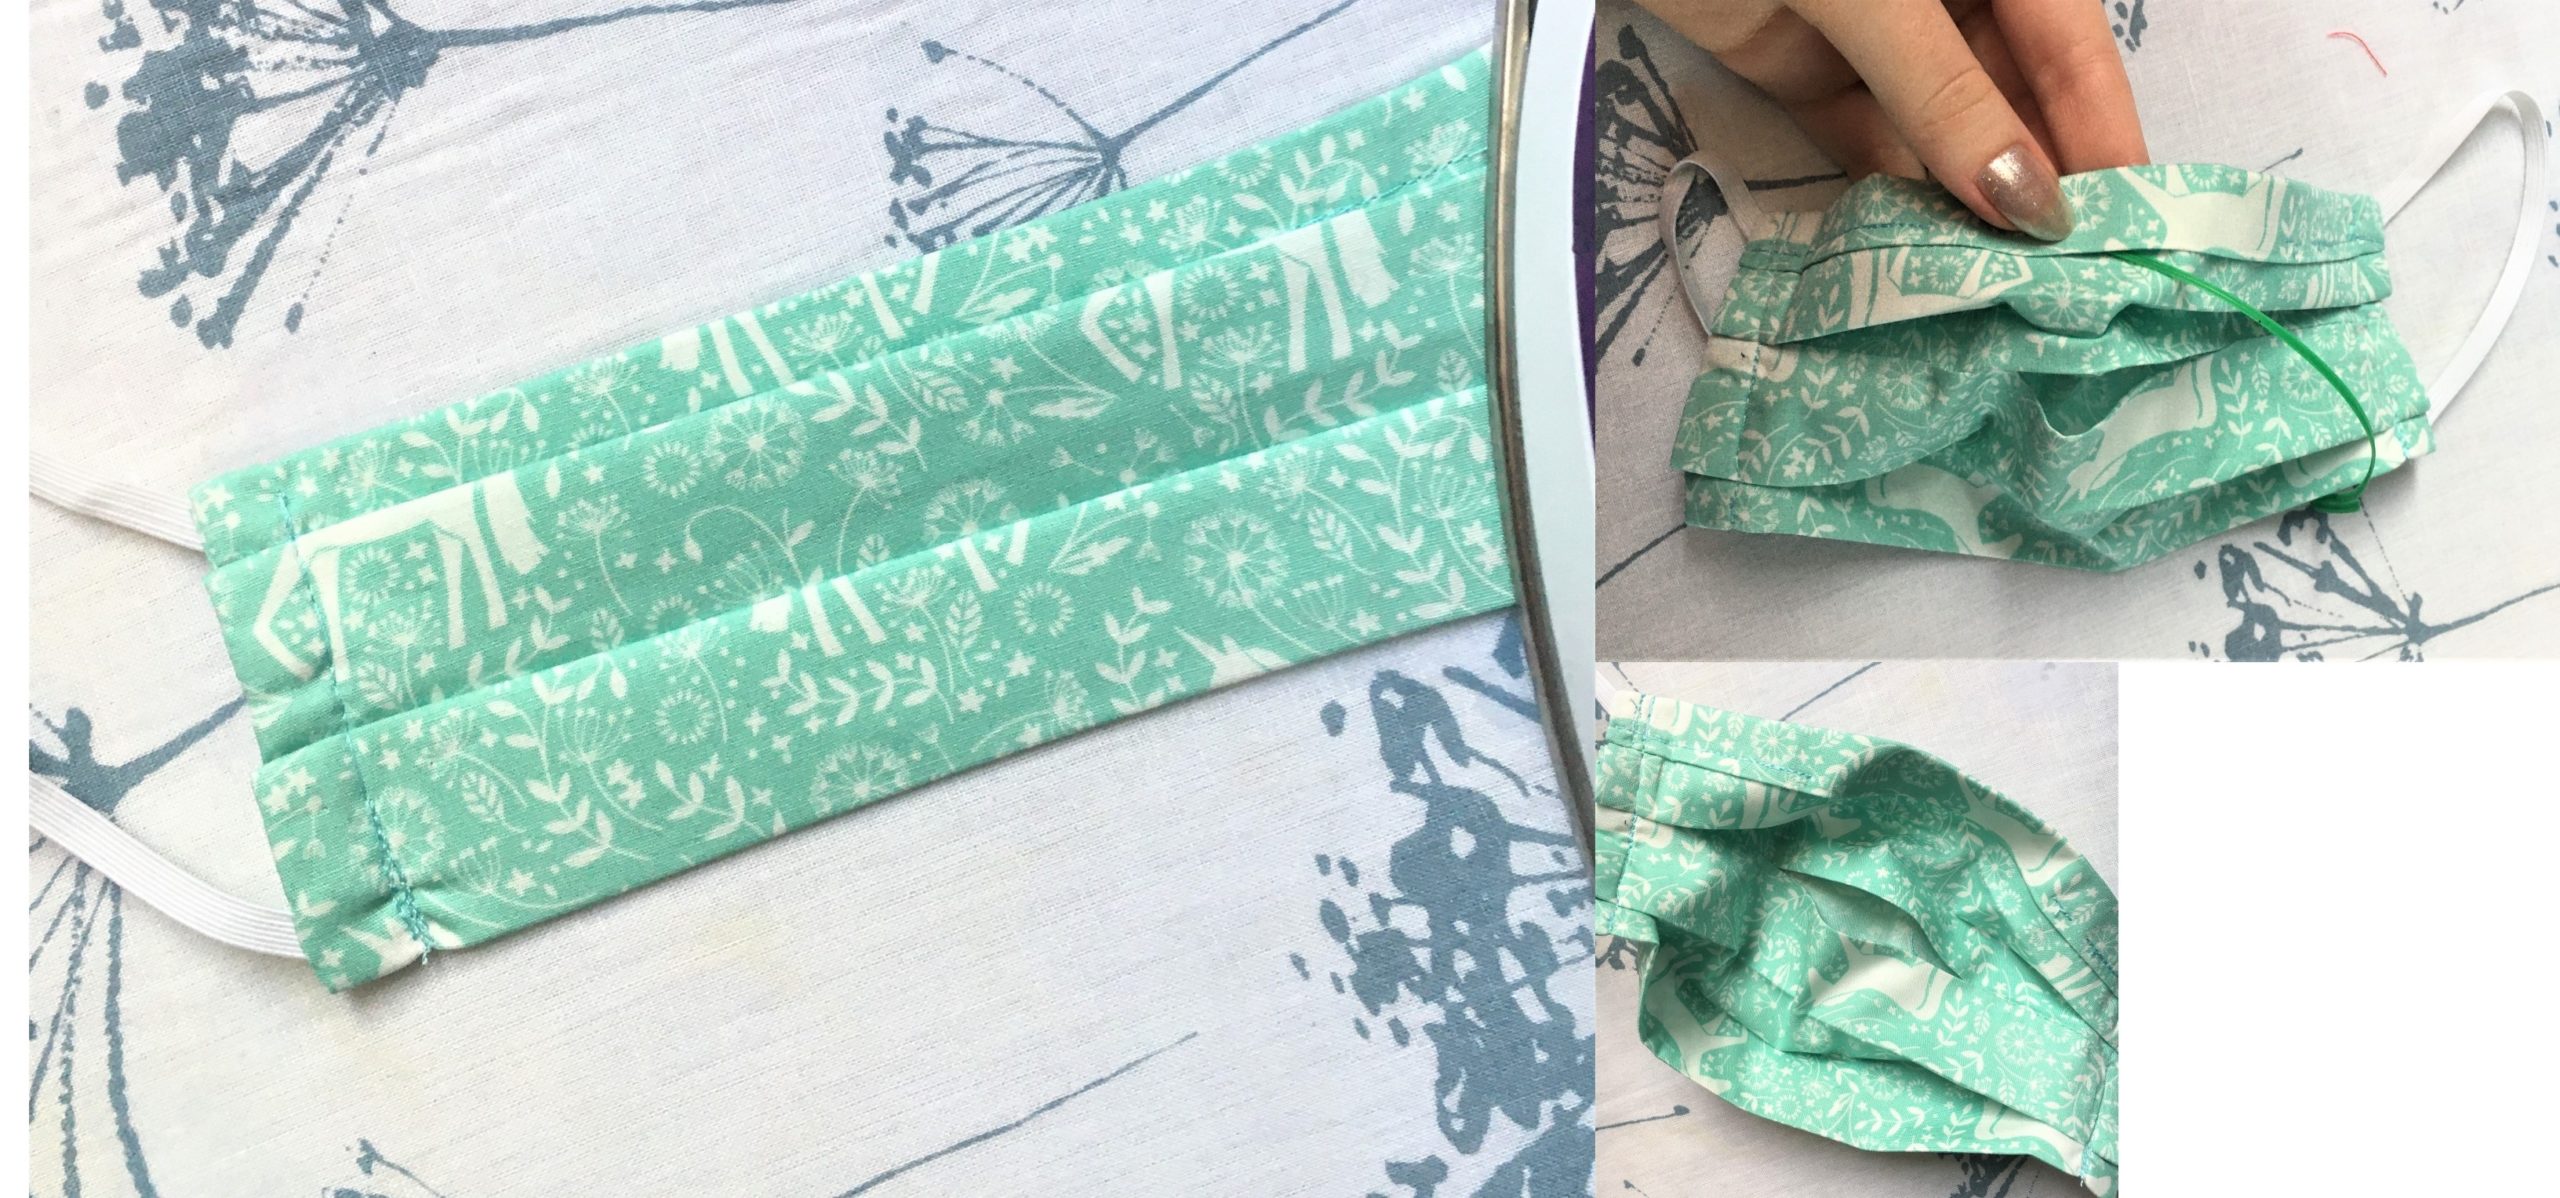
Once that’s done, press the whole thing. (As you can see, mine is a little wonky! It still works fine – you can even it out when adding pleats later!)
Next, we’ll make a channel at the top of the mask to insert a wire.
This is relatively important to fit the mask to your face shape. Not to mention, if you wear glasses, it will help to keep them from steaming up when you’re wearing your mask.
It is also important that it can be removed so that the mask can be washed after every outing.
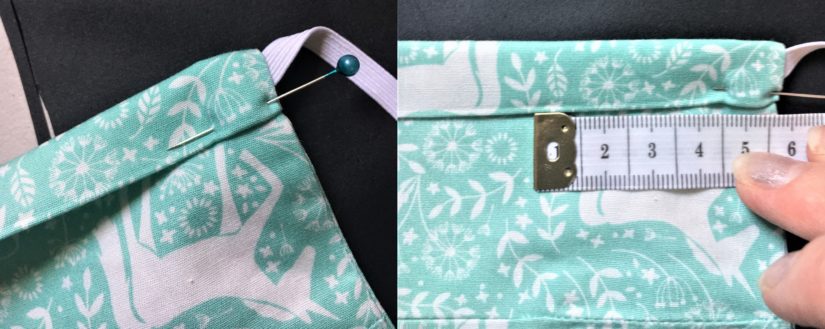
Turn over 1 cm (slightly less than ½ inch) from the top edge of your mask. (If you’re not using a patterned fabric with a clear correct way up, either edge will do).
You want the channel to be on the back side of the mask that will be touching your face.
Pin the fold in place; press it if you like, and then mark around 5 – 8 cm along the width of the new fold. You’ll sew along it, much like you did earlier, and press it.
The gap you leave depends entirely on what length of wire you’re using.
If it’s short, such as a folded out paper clip, you might want to sew in further to make sure it’s held in place securely. I used gardening wire, so I could cut it to custom lengths. We’ll insert the wire right at the end.
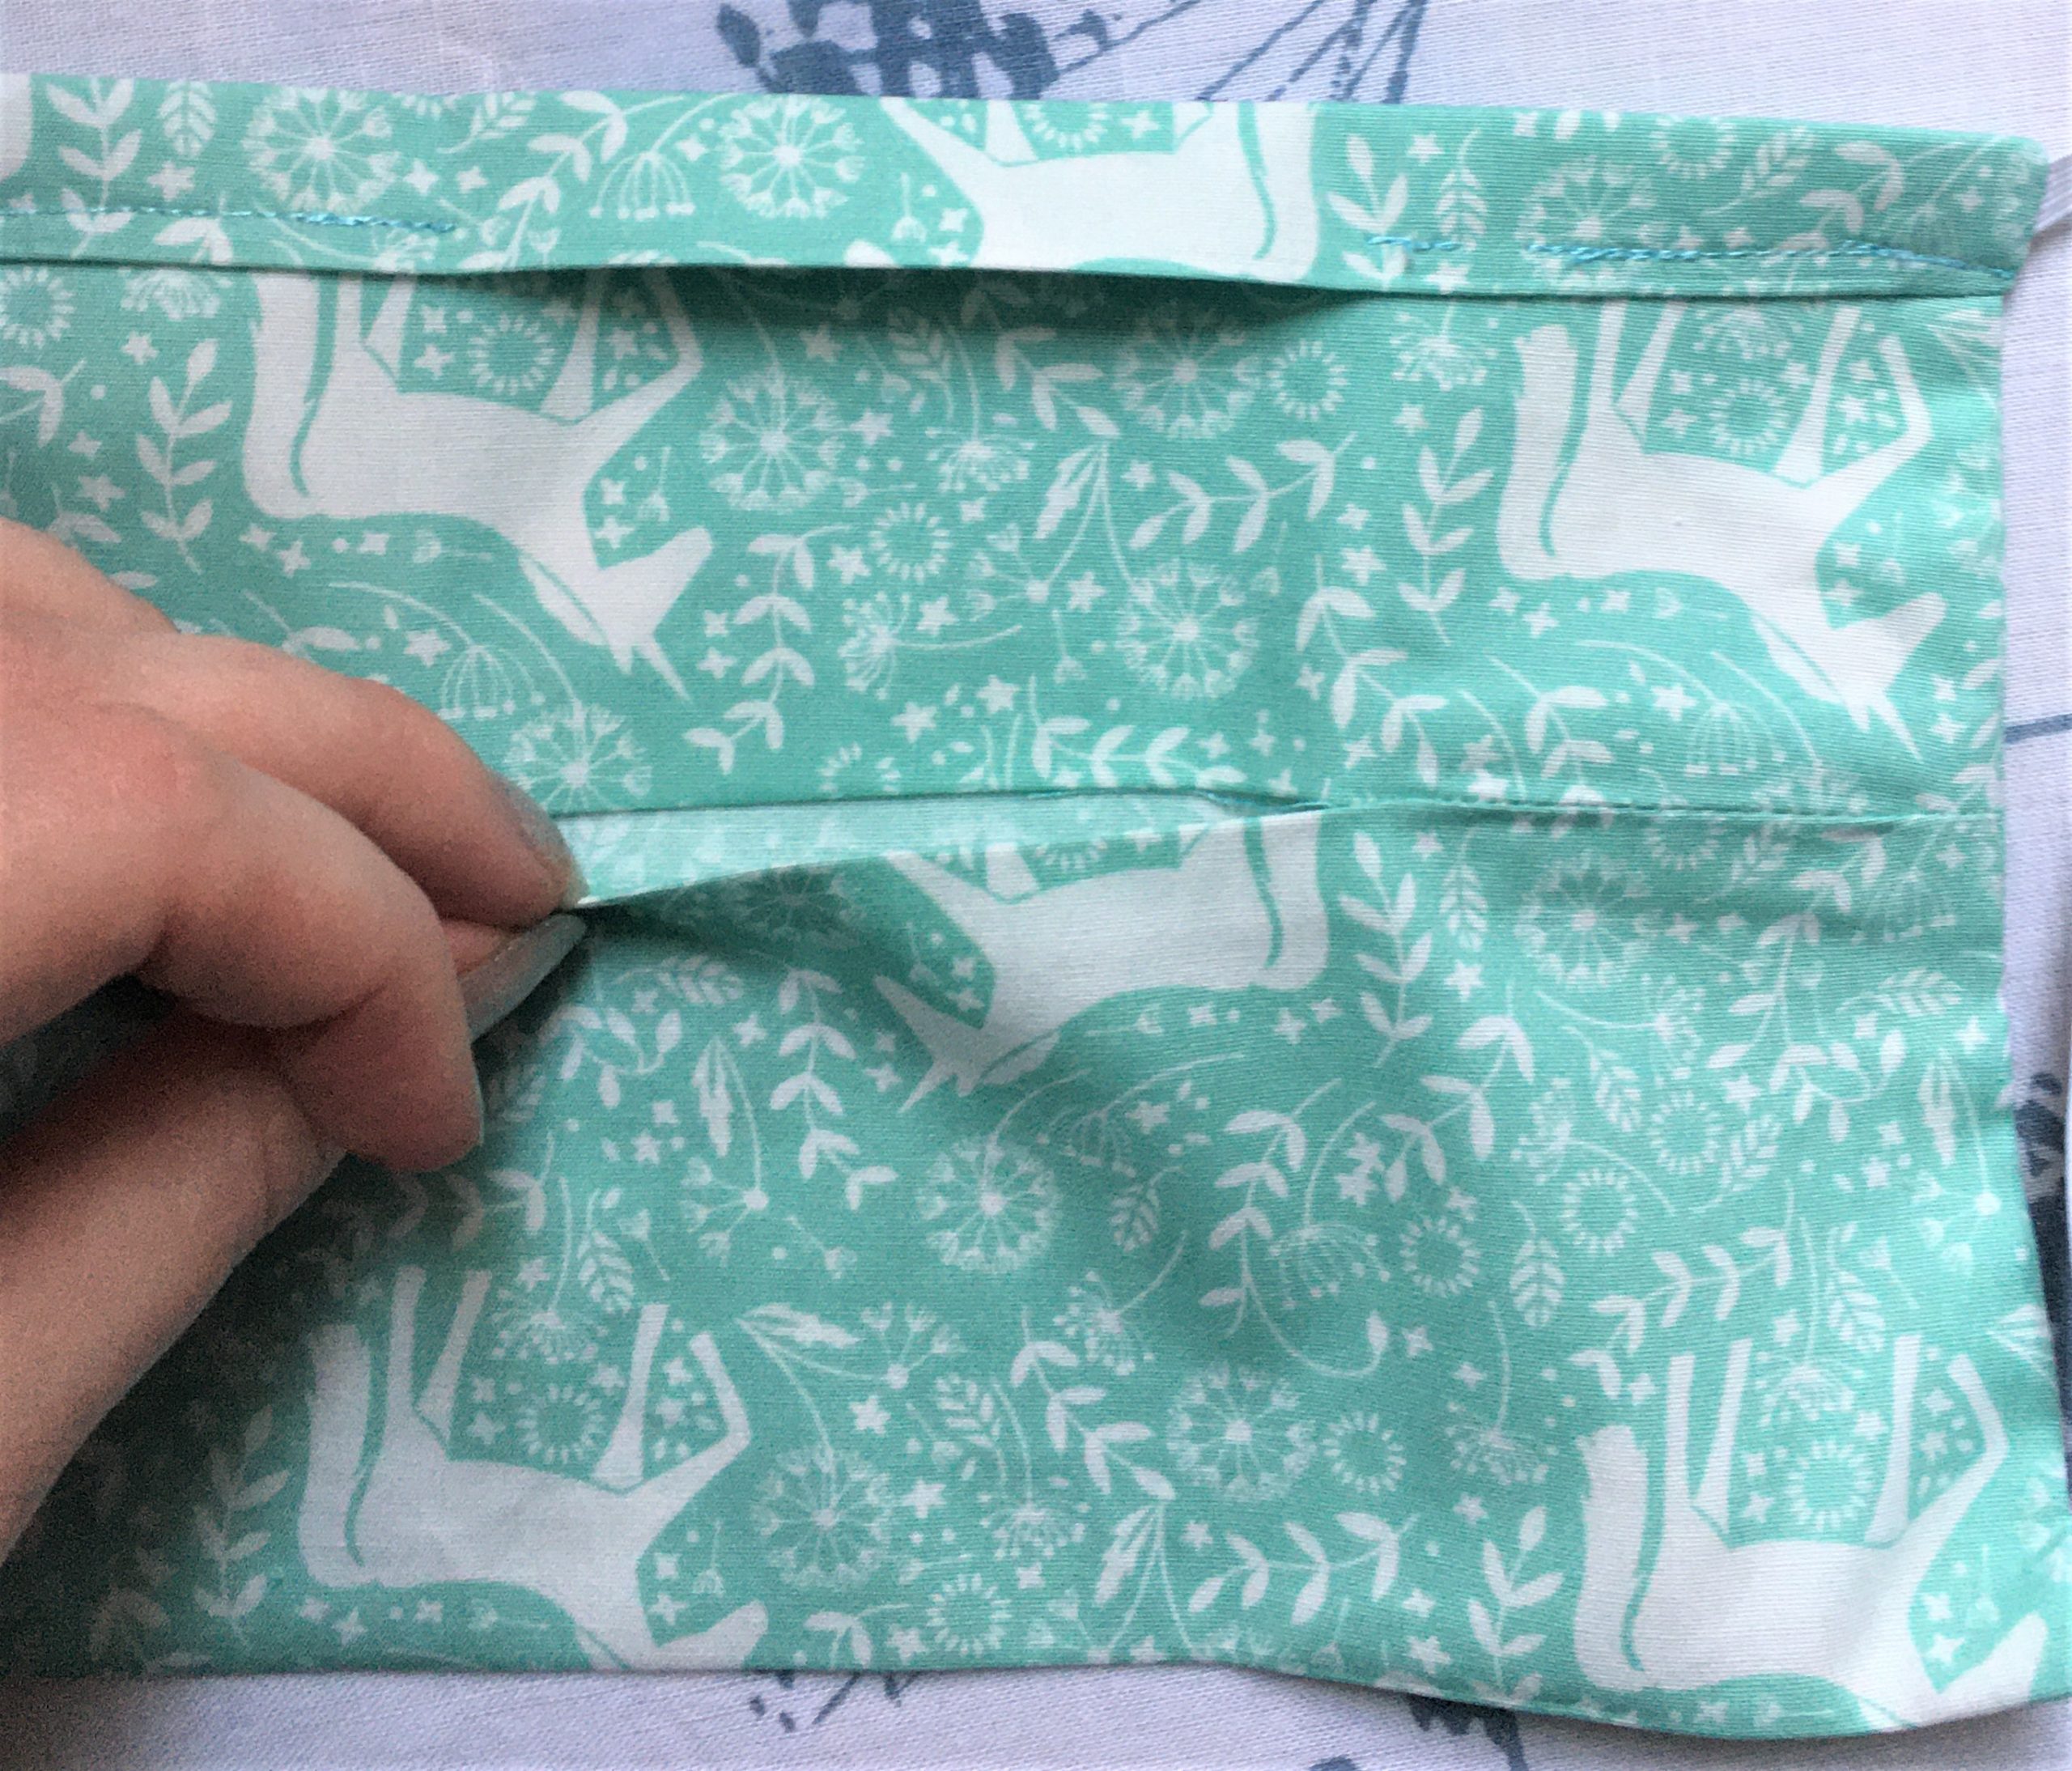
We’re in the home straight! Now you should have a rectangle, with a small fold at the top.
We’ll use the line of stitches you just made to measure down the rest of the mask. The length of the sides should be roughly 12 cm.
Make a small mark every 3 cm down. (Eg. a small mark at 3 cm, 6 cm, 9 cm.)
If you’re familiar with sewing, we will simply be making three pleats in the fabric. If you haven’t done this before, don’t worry, it is relatively simple.
Simply take the mark you made at the 3 cm point, and line it up with the line of stitches and pin it in place. Take the mark you made at the 9 cm point, line it up with the mark at 6 cm, and likewise pin it in place.
To line the marks up, the easiest way is to make a sort of ‘pinching’ movement with one hand, and then pin. I am not a professional sewist or tutorial maker (perhaps for good reason) so hopefully my pictures can explain better than I can.
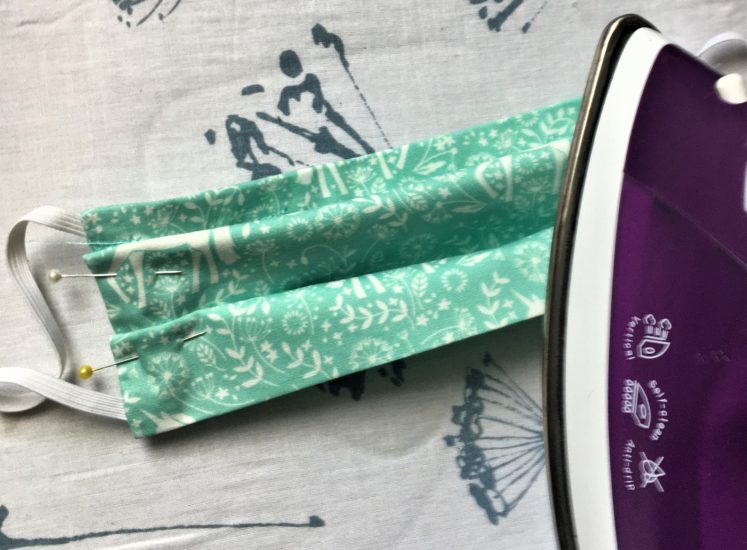
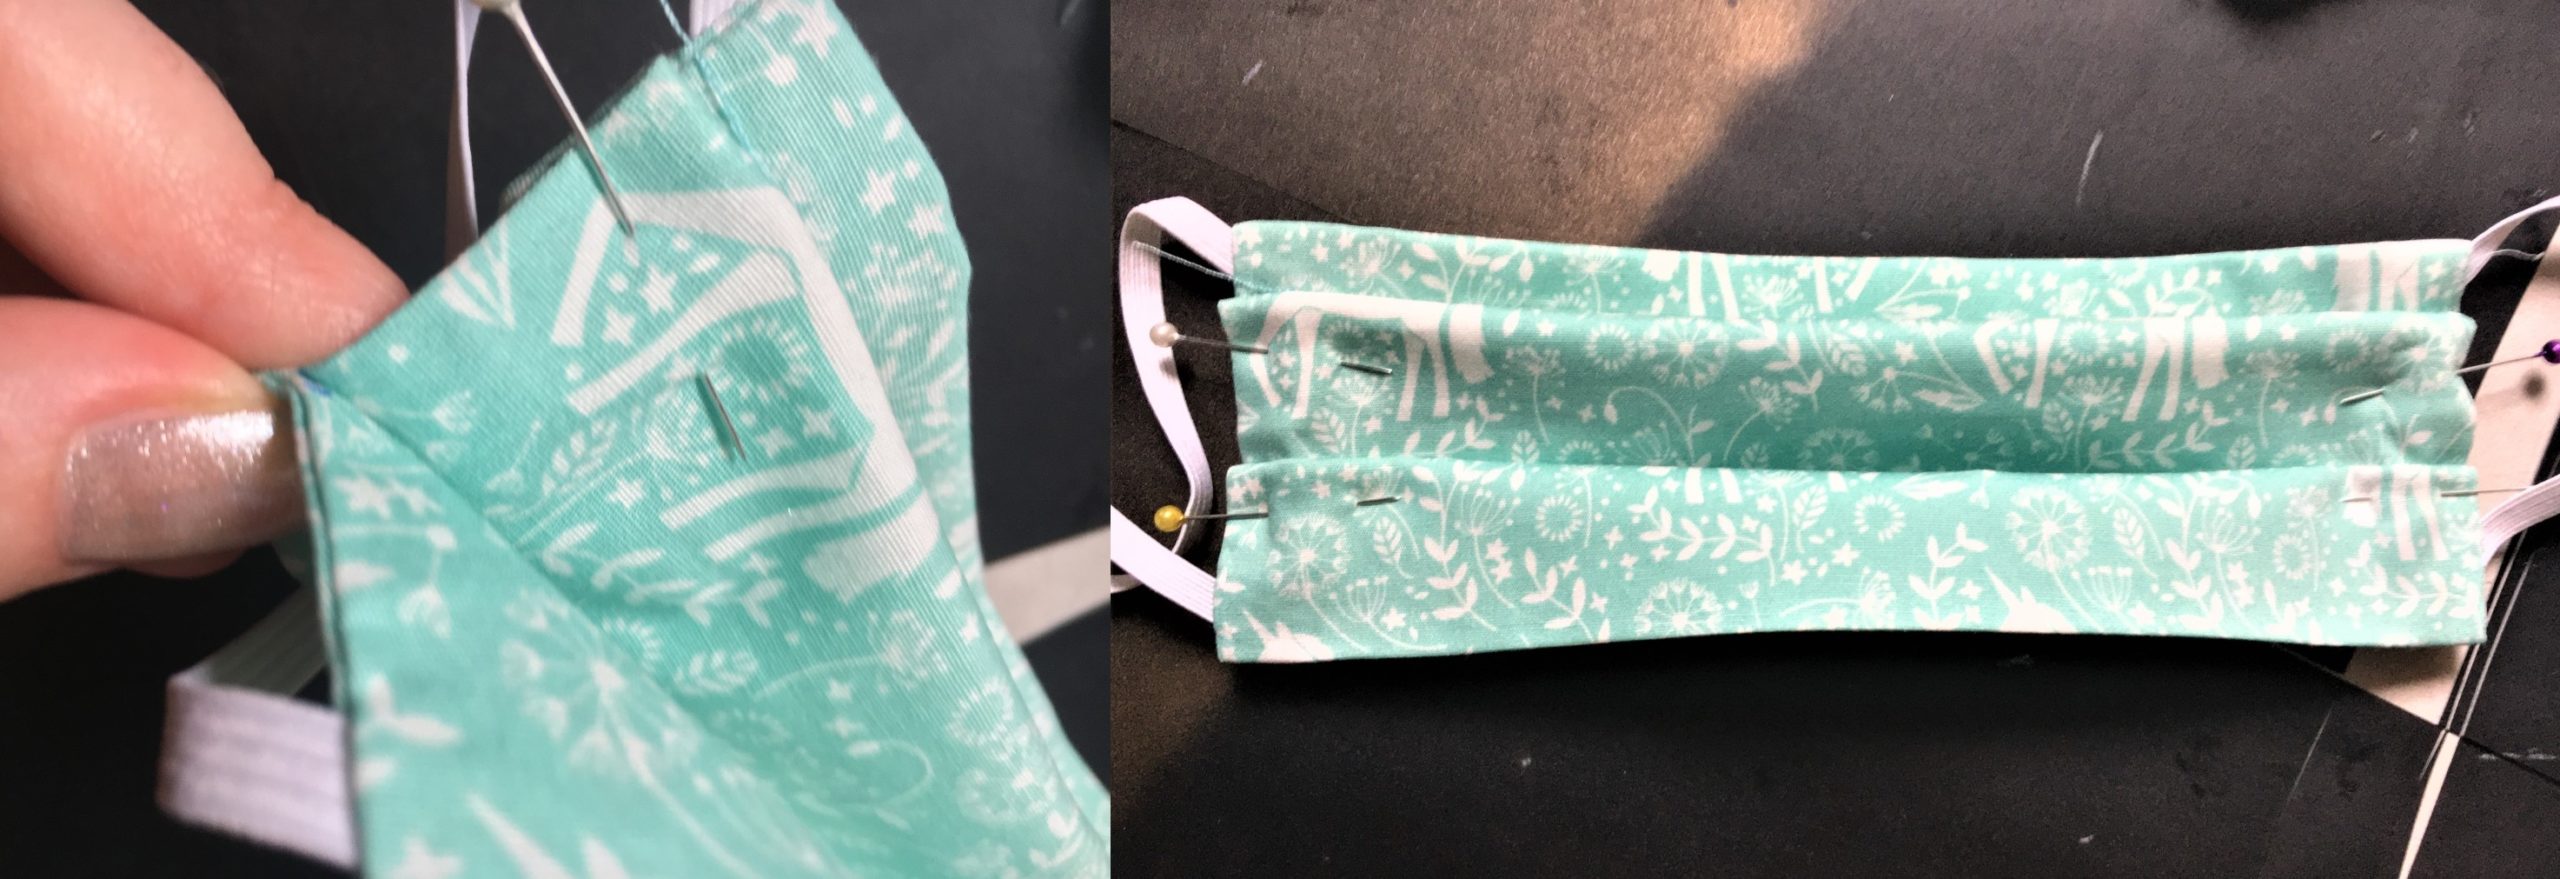
It is important that you iron the pleats in place, without removing the pins. You may find it helpful to iron as you go, or do what I did and iron all three in one go.
If you’re using plastic-headed pins, be sure not to iron over the plastic!
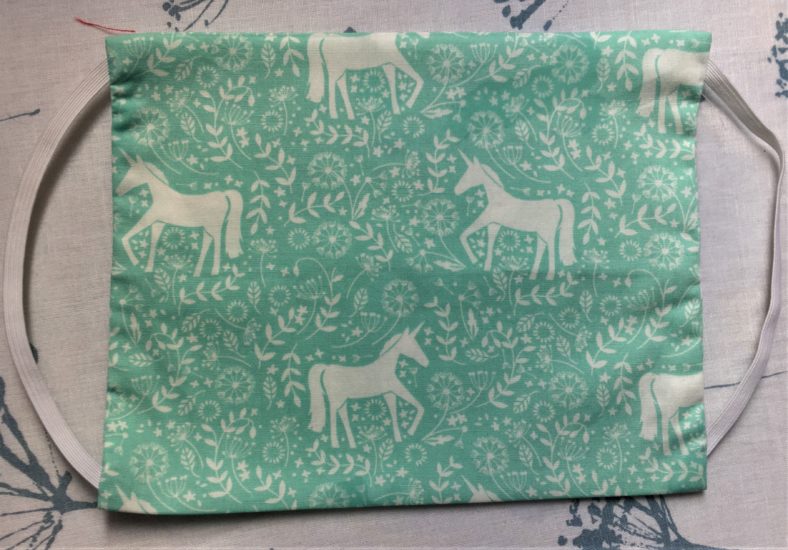
The final big step!
Once your pleats are pinned in place, simply place the mask on the sewing machine once again, line the presser foot up with the short edge of the fabric, and sew a straight stitch across the pleats in one go, backstitching at the beginning and end to secure the stitches in place.
After one last blast with the iron to secure the stitches in place, your mask is all but complete!
If you’re using a filter, now’s the time to place it in the centre pocket, and to add the wire to the top fold you made earlier.
That is your mask complete and ready to wear!
Filters should be replaced after every wear, and removed before washing.
Likewise, the wire should be removed before washing, as it risks going rusty if it is left to get wet.
How do you wear it?
The mask is breathable and adjustable.
You simply push the pleats outwards to open it up, place it directly over your face, and loop the elastics over your ears.
It is very important that you wear it to cover your nose, mouth and chin.
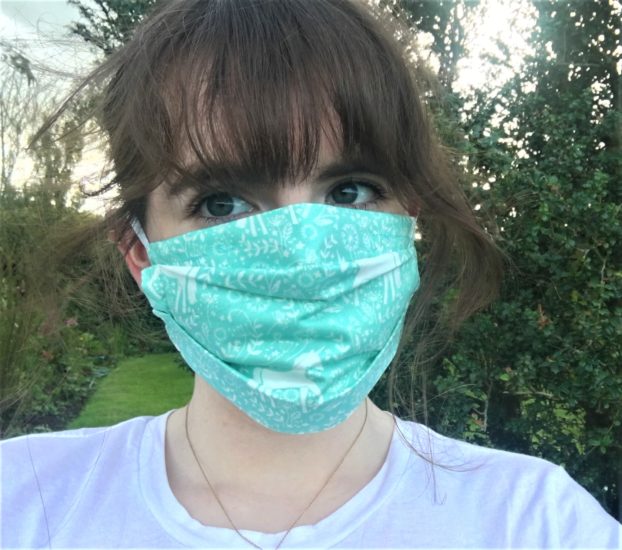
It should be flush with your face — no gaping anywhere.
I recommend you watch this short and very helpful video from WHO that explains all the necessary measures you should take when wearing and removing face masks like this.
(Also, please no one mention my lockdown hair cut!)
For more great craft projects from “The People’s Friend”, click here.