
Make Your Own Planter
Fiction Ed Shirley gets creative for National Gardening Week.
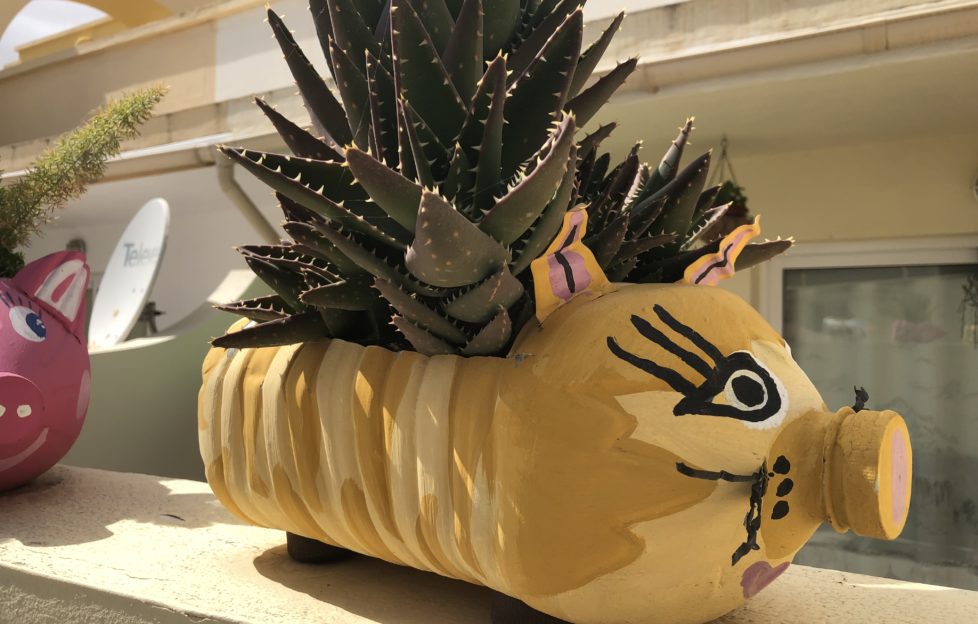
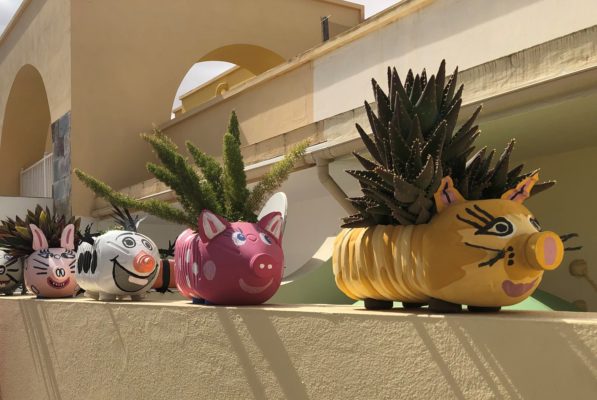
I spotted these planters when I was on holiday in Fuerteventura. There was a whole row of them, each decorated slightly differently, on a wall round a patio. Aren’t they clever? And dual purpose.
They’re a cute way to brighten up a concrete space, but they also re-use plastic water flagons that otherwise would end up in land-fill.
I took the pictures with the intention of trying the idea for myself, and thought I’d share how I intend to do it. Perhaps you can try it too!
Creating Your Planter
Take one empty five-litre water flagon and lay it on its side.
Cut out a section perhaps about eight inches by six or seven. You don’t want to cut so far down the sides that the soil falls out.
These ones are planted with cactus in a dry climate, so I doubt there were drainage holes. Living in the UK, however, I’ll cut a few drainage holes in what will be the base.
Decorating Your Planter
I’ll have to experiment with different types of paint, but acrylics should work. Paint on a pattern of your choice. The ones I saw were painted as animals with snouts to use the shape of the bottle, e.g. a tortoiseshell cat, a pink pig, a grey rabbit . . . it’s your chance to be creative!
Once that’s dry and decorated to your satisfaction, remember to add ears and whiskers.
For the ears, cut two triangle shapes from the bit of plastic we cut out and glue them on, then paint to match.
The whiskers are long, thin strips of the plastic. Mind your fingers when you’re cutting these! Paint them black before gluing them on.
Once it’s all dry, we’re ready for planting!
Planting
Place some broken crocks or stones in the bottom where you’ve made the drainage holes, then fill the planter with ordinary potting compost.
All that’s left to do is plant it up with plants of your choice.
You might go for bright perennials, a luscious trailer or two, or — as here — a specimen cactus.
Me? I love Livingstone daisies, so I might try them.
Then it sits on some of those little planter feet to keep it up off the ground.
Job done!
Check out more of our gardening tips here.